Key Tasks Performed by an EASI Administrator 1. Onboarding Parent Organizations: Adding details of the parent organization and assigning the initial admin responsible for tasks within the EASI Purchase Management System (EPMS). 2. Managing MCC Range and Details: Updating the MCC range and details in Settings upon request from EPMS admins. 3. Supporting EPMS Admins: Assisting EPMS admins during critical situations and occasionally performing tasks on their behalf. 4. Monitoring: Overseeing parent organizations, their sub-levels, and the overall status of the expense management system
In the EASI Admin Portal, all functionalities and pages are similar to those in the EPMS Admin Portal, allowing admins to access and act based on their requirements. The exceptions in EASI Admin Portal are:
View of Parent Organizations: EASI admin can view all parent organizations of different companies utilizing the EPMS Admin Portal.
Settings Page: The Settings page does not include Accounts and Recurring Transactions.
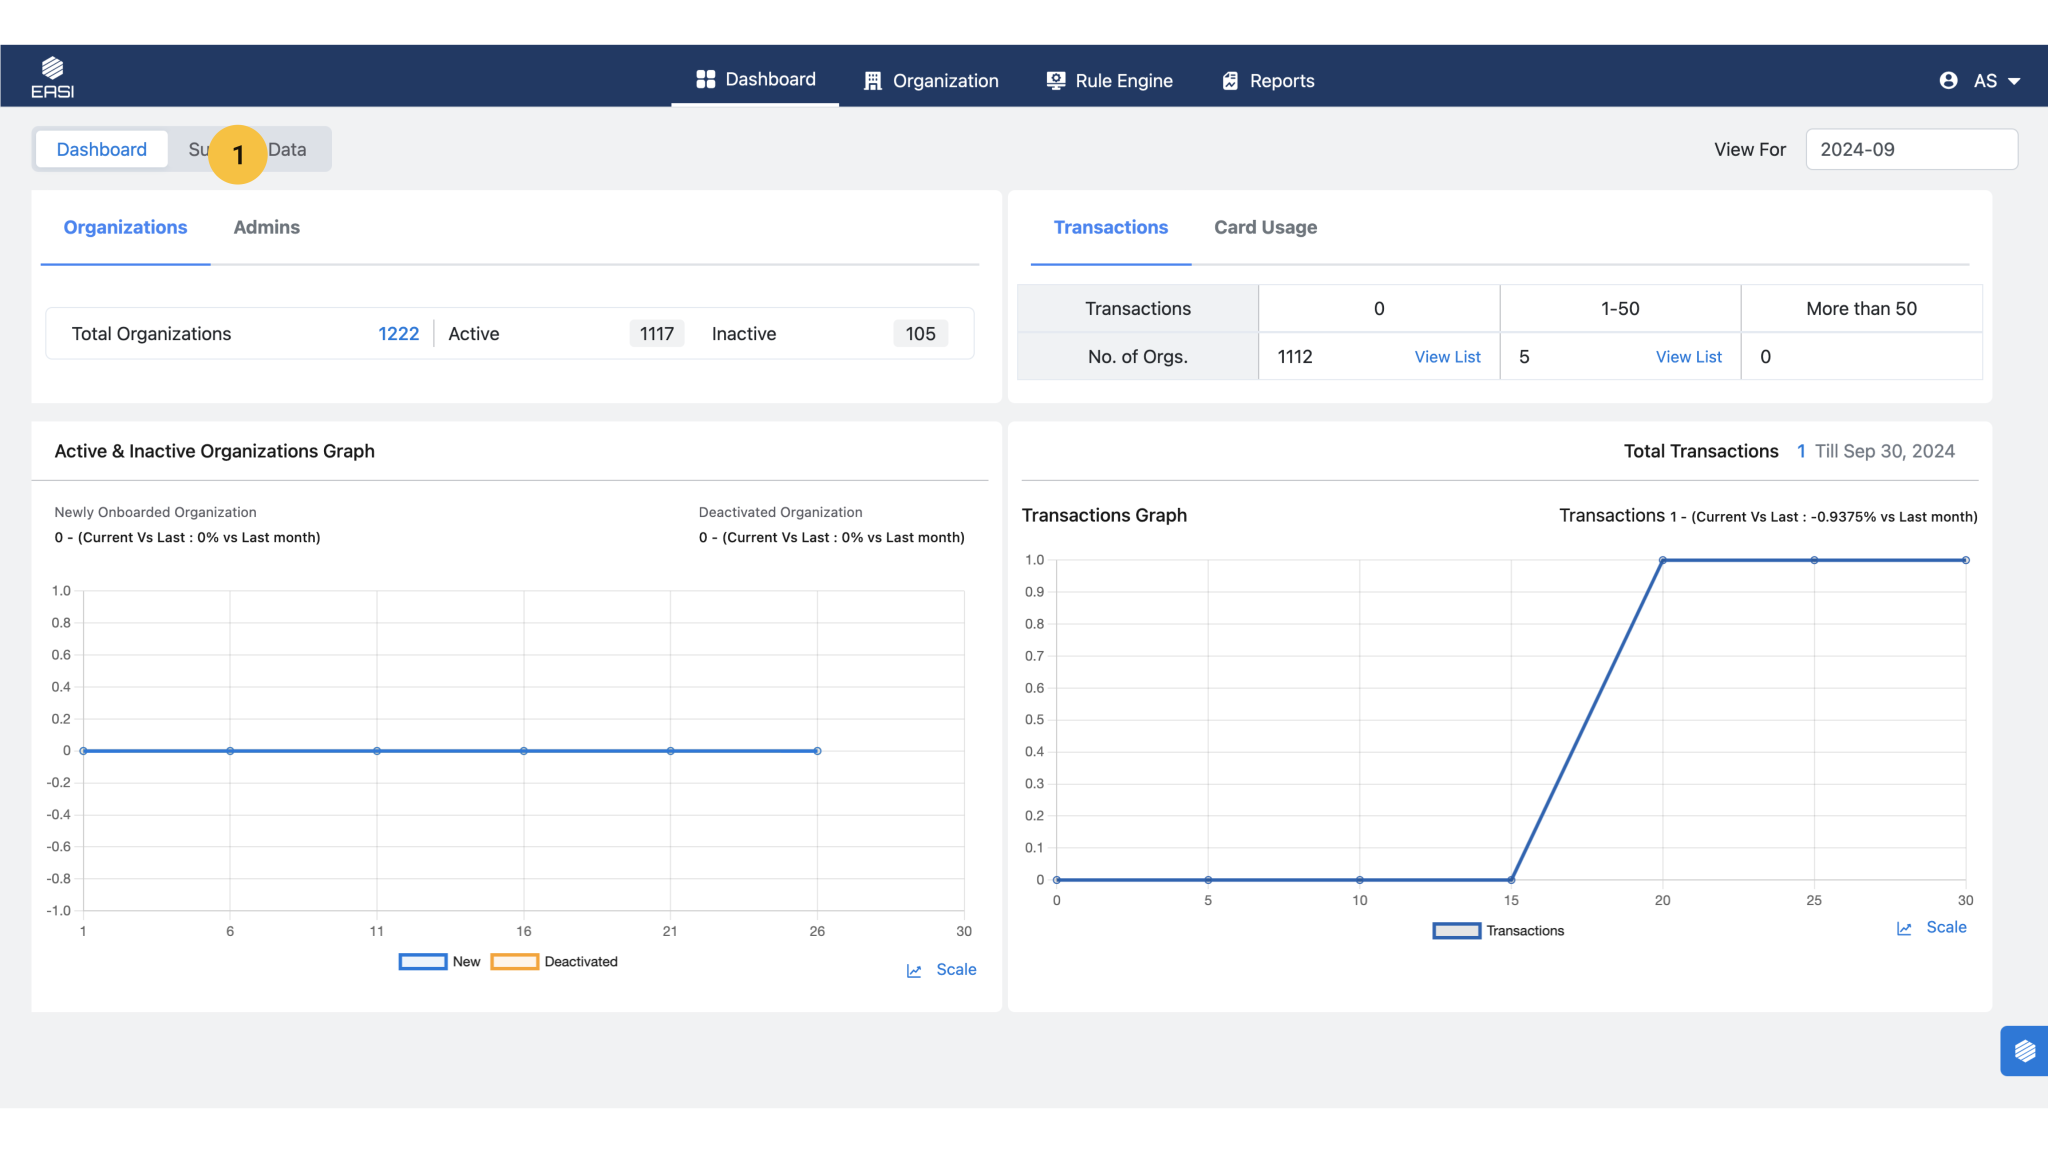
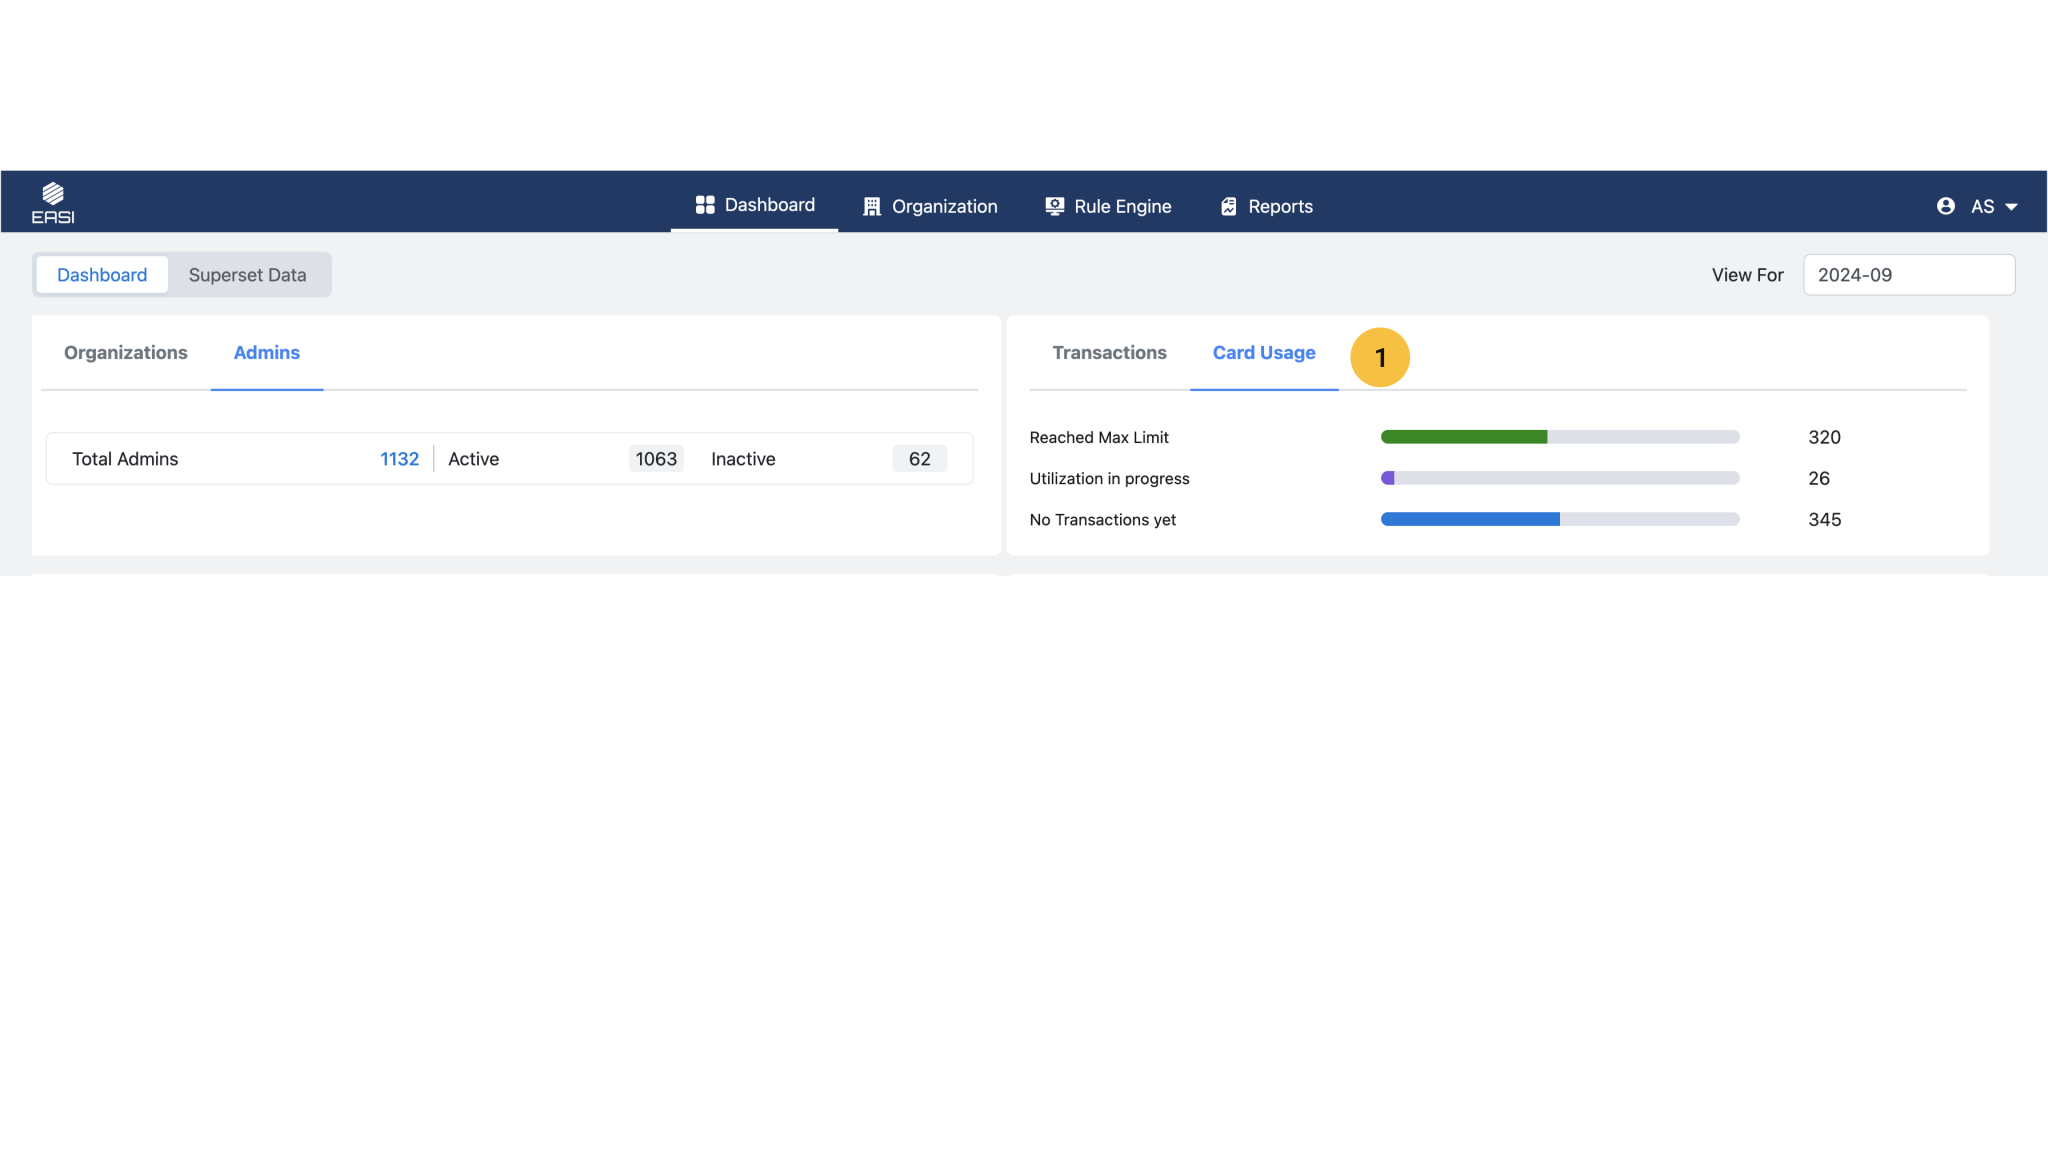
Dashboard: The dashboard is structured to provide an overview of all parent organizations, their admins, overall transactions, and card usage.
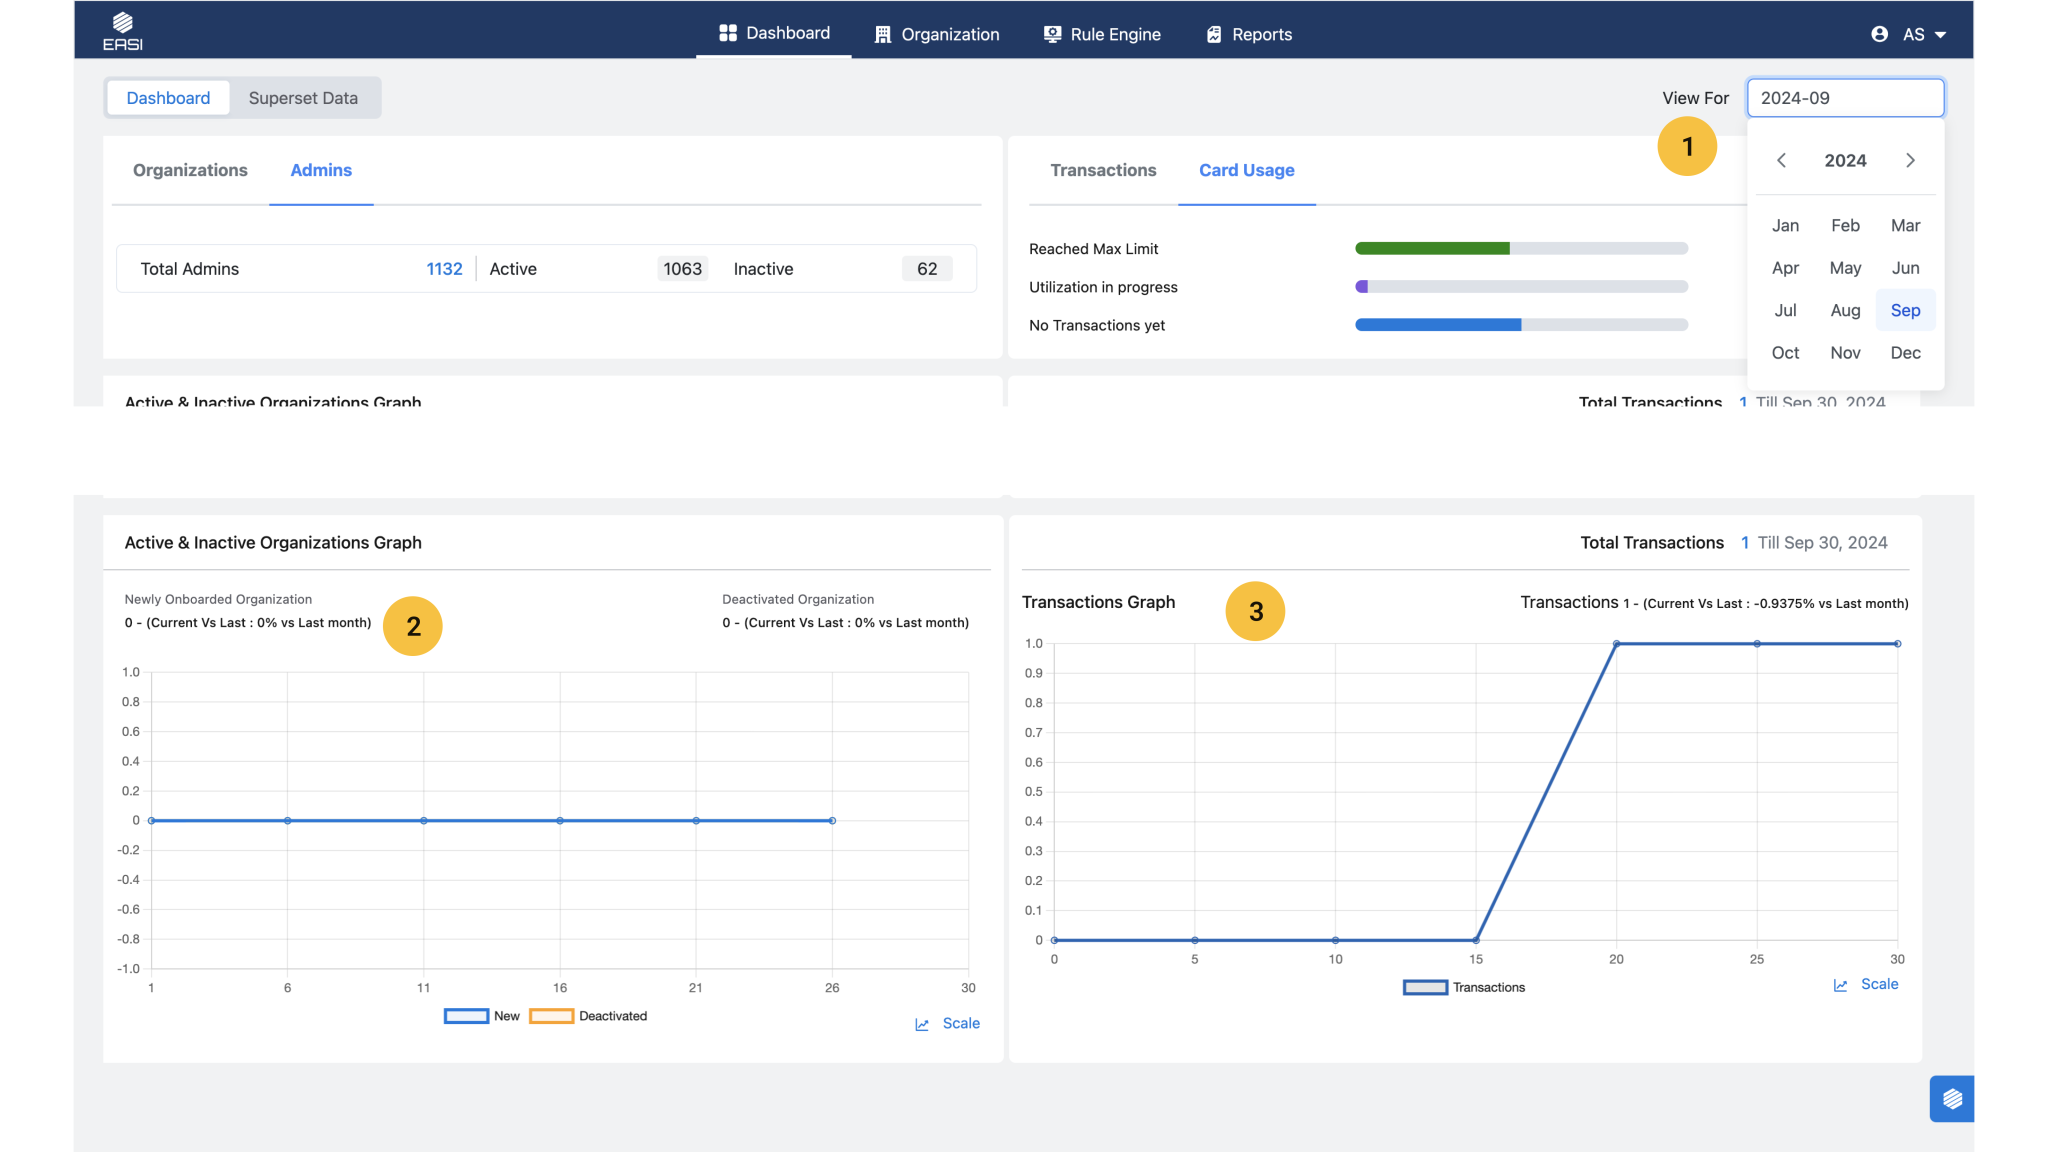
The dashboard provides an overview of all parent organizations and the admins. It displays the overall transaction rate and card usage. Additionally, it features graphs illustrating active versus inactive organizations and transaction trends over a specified time period.
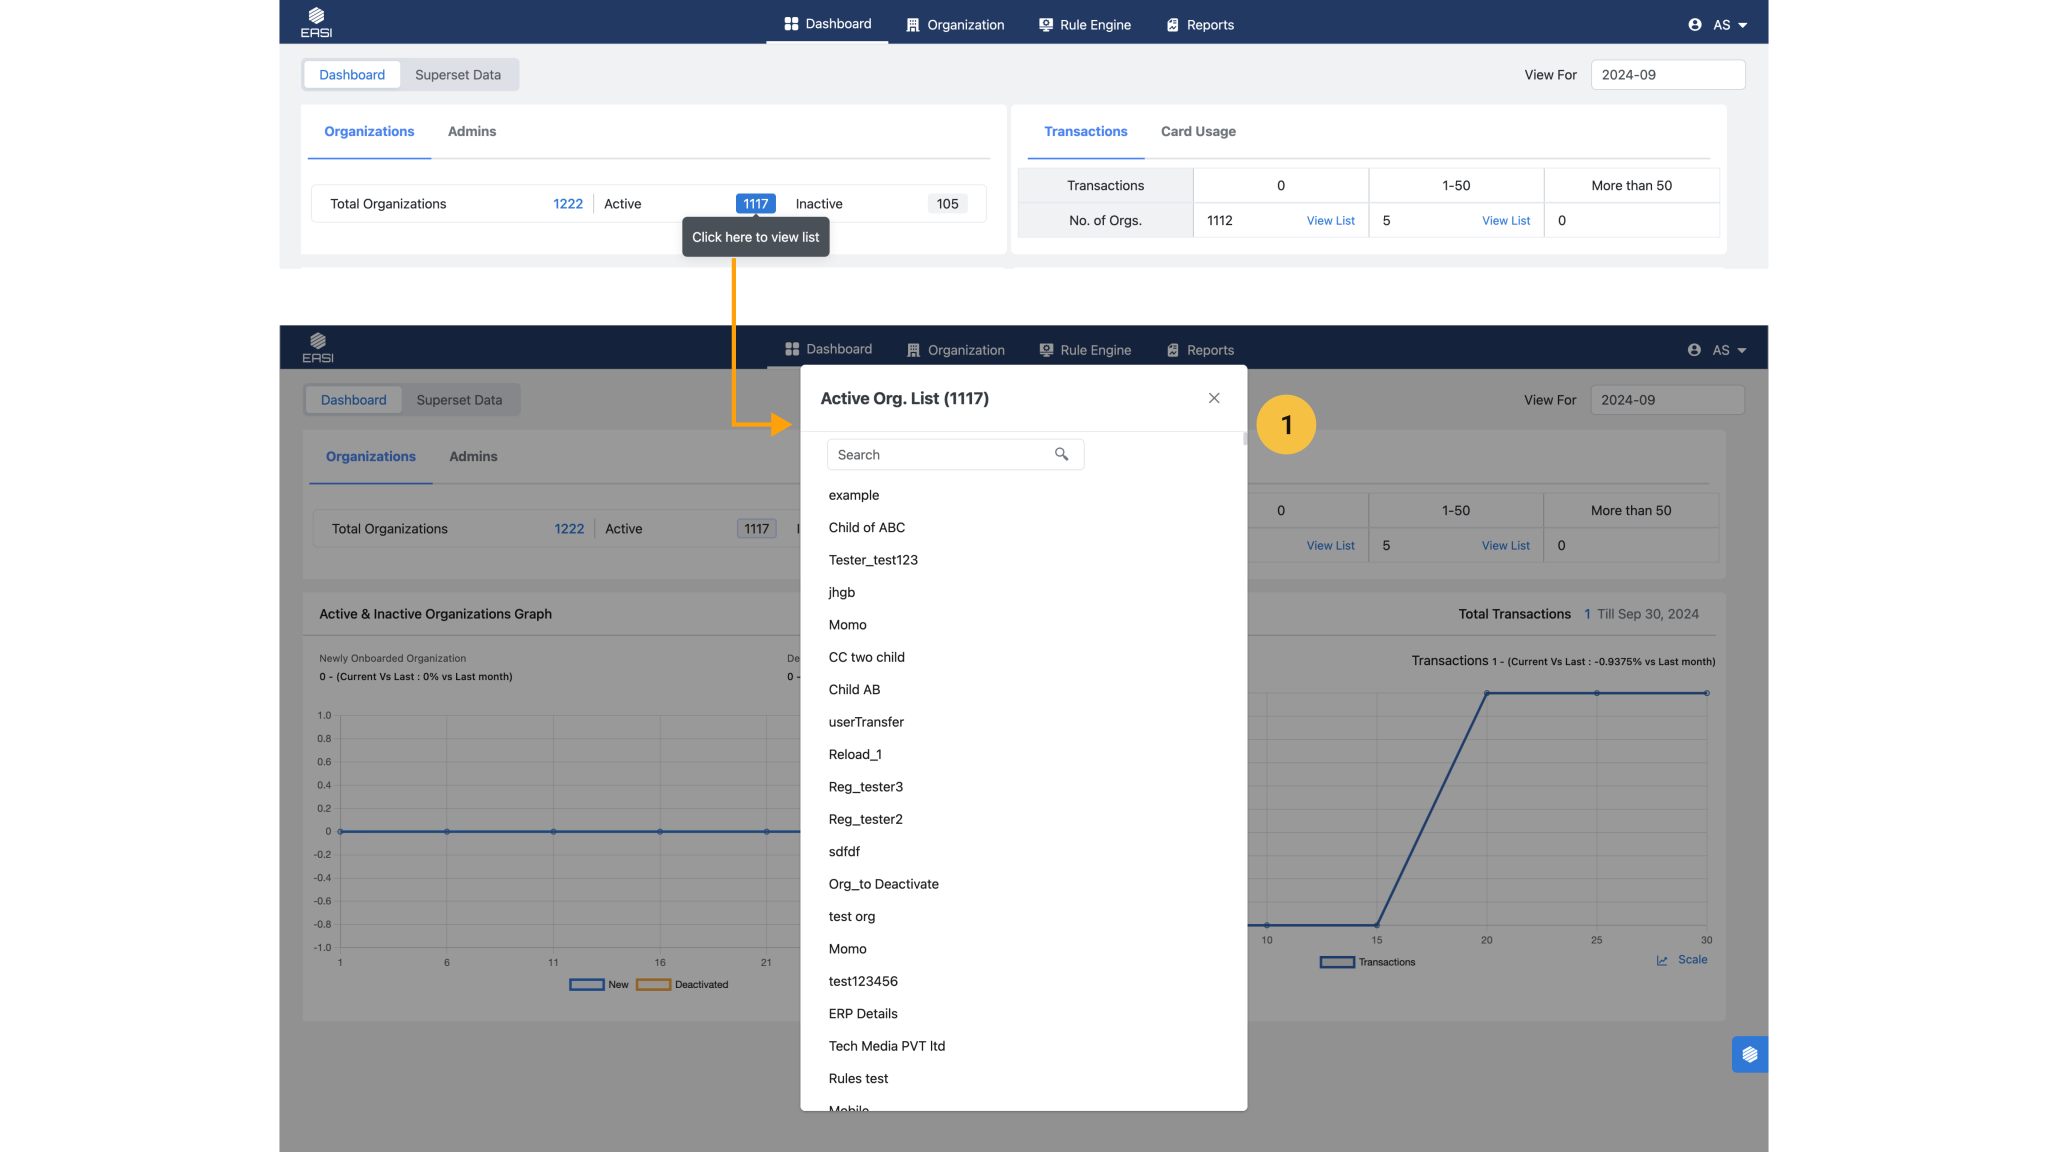
<span data-metadata=""><span data-buffer="">Organization list modal window
The list of active / inactive organization can be viewed here by scrolling list or searching.
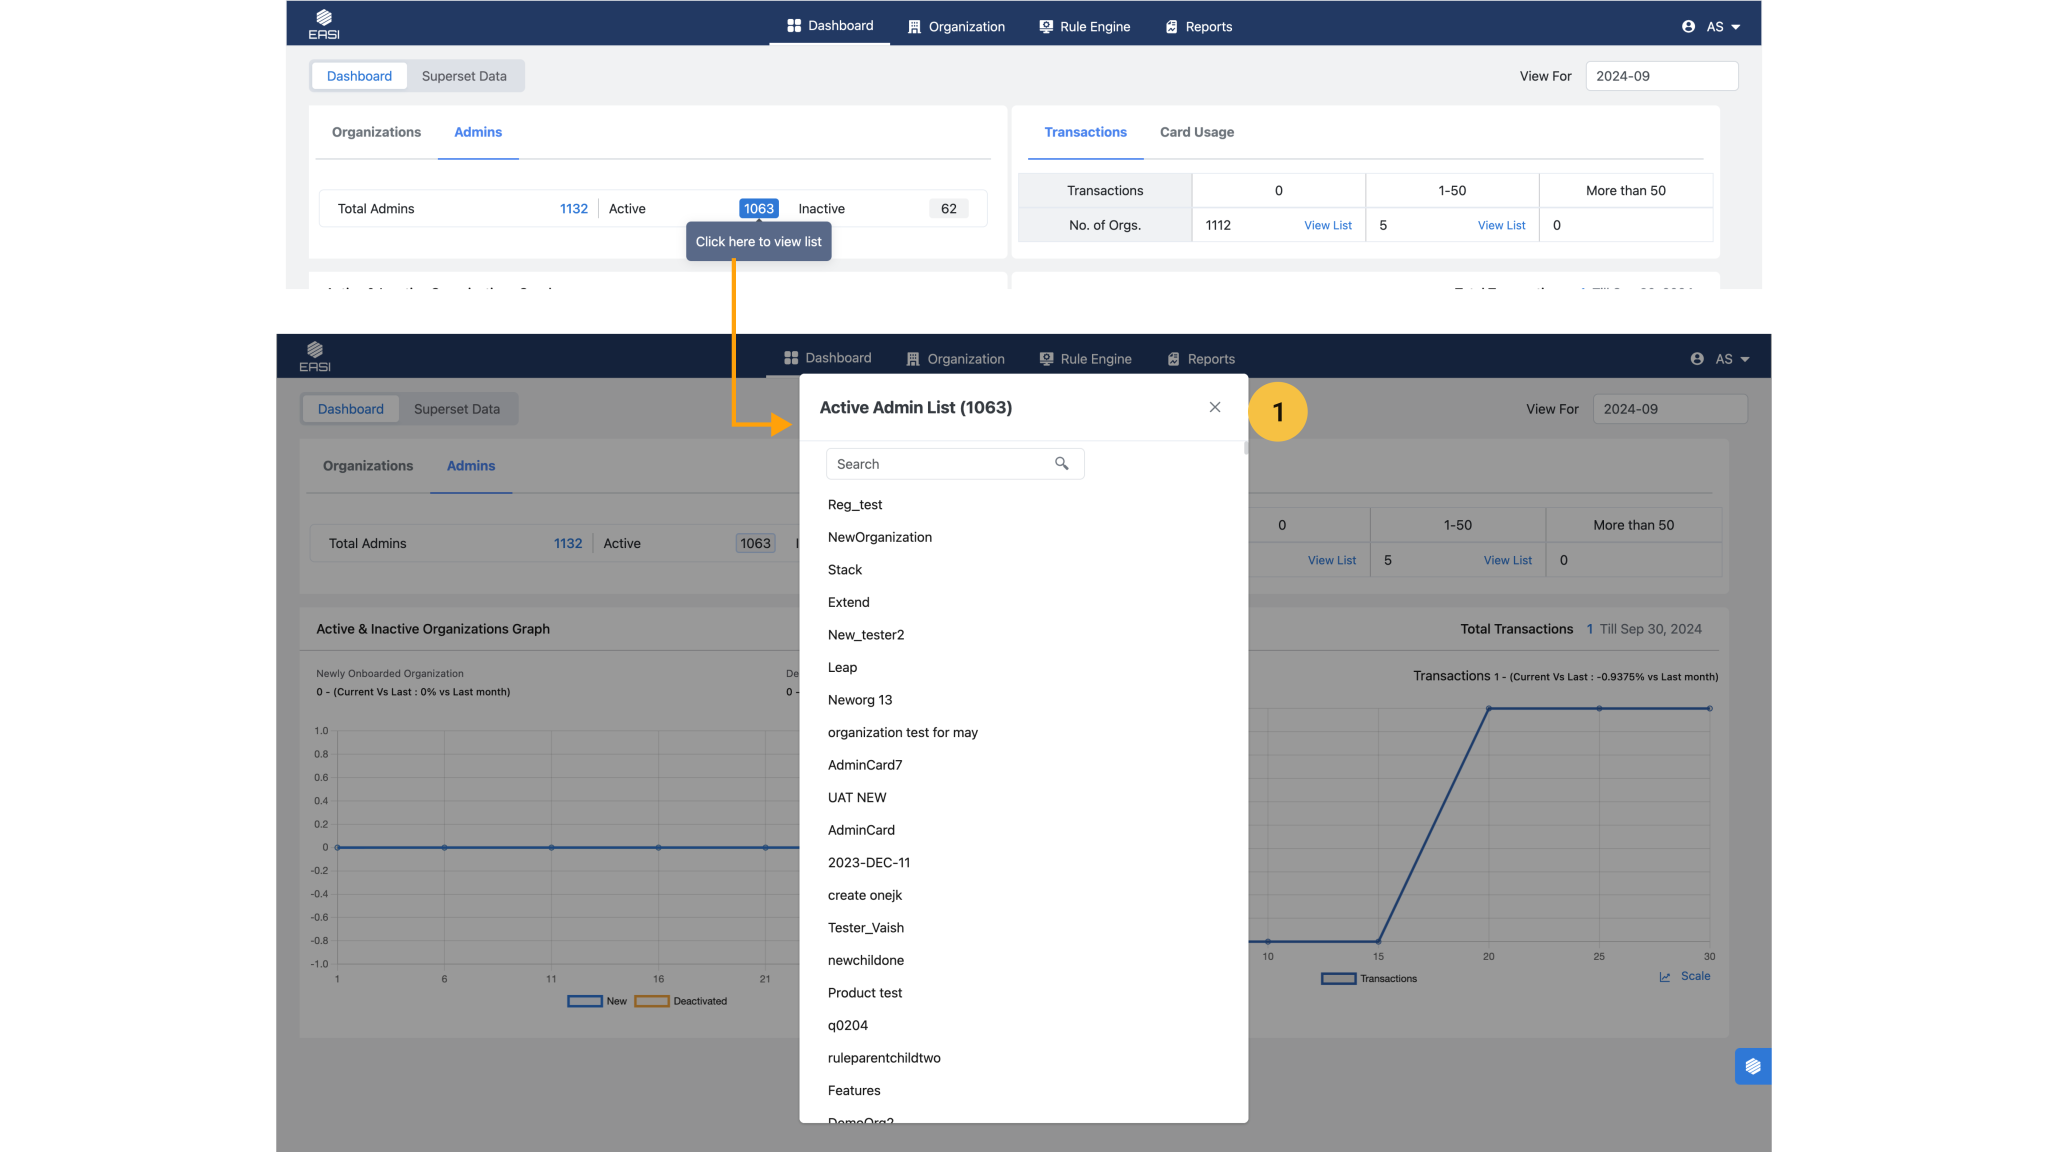
Admin list modal window
The list of active / inactive primary EPMS admins can be viewed here by scrolling list or searching..
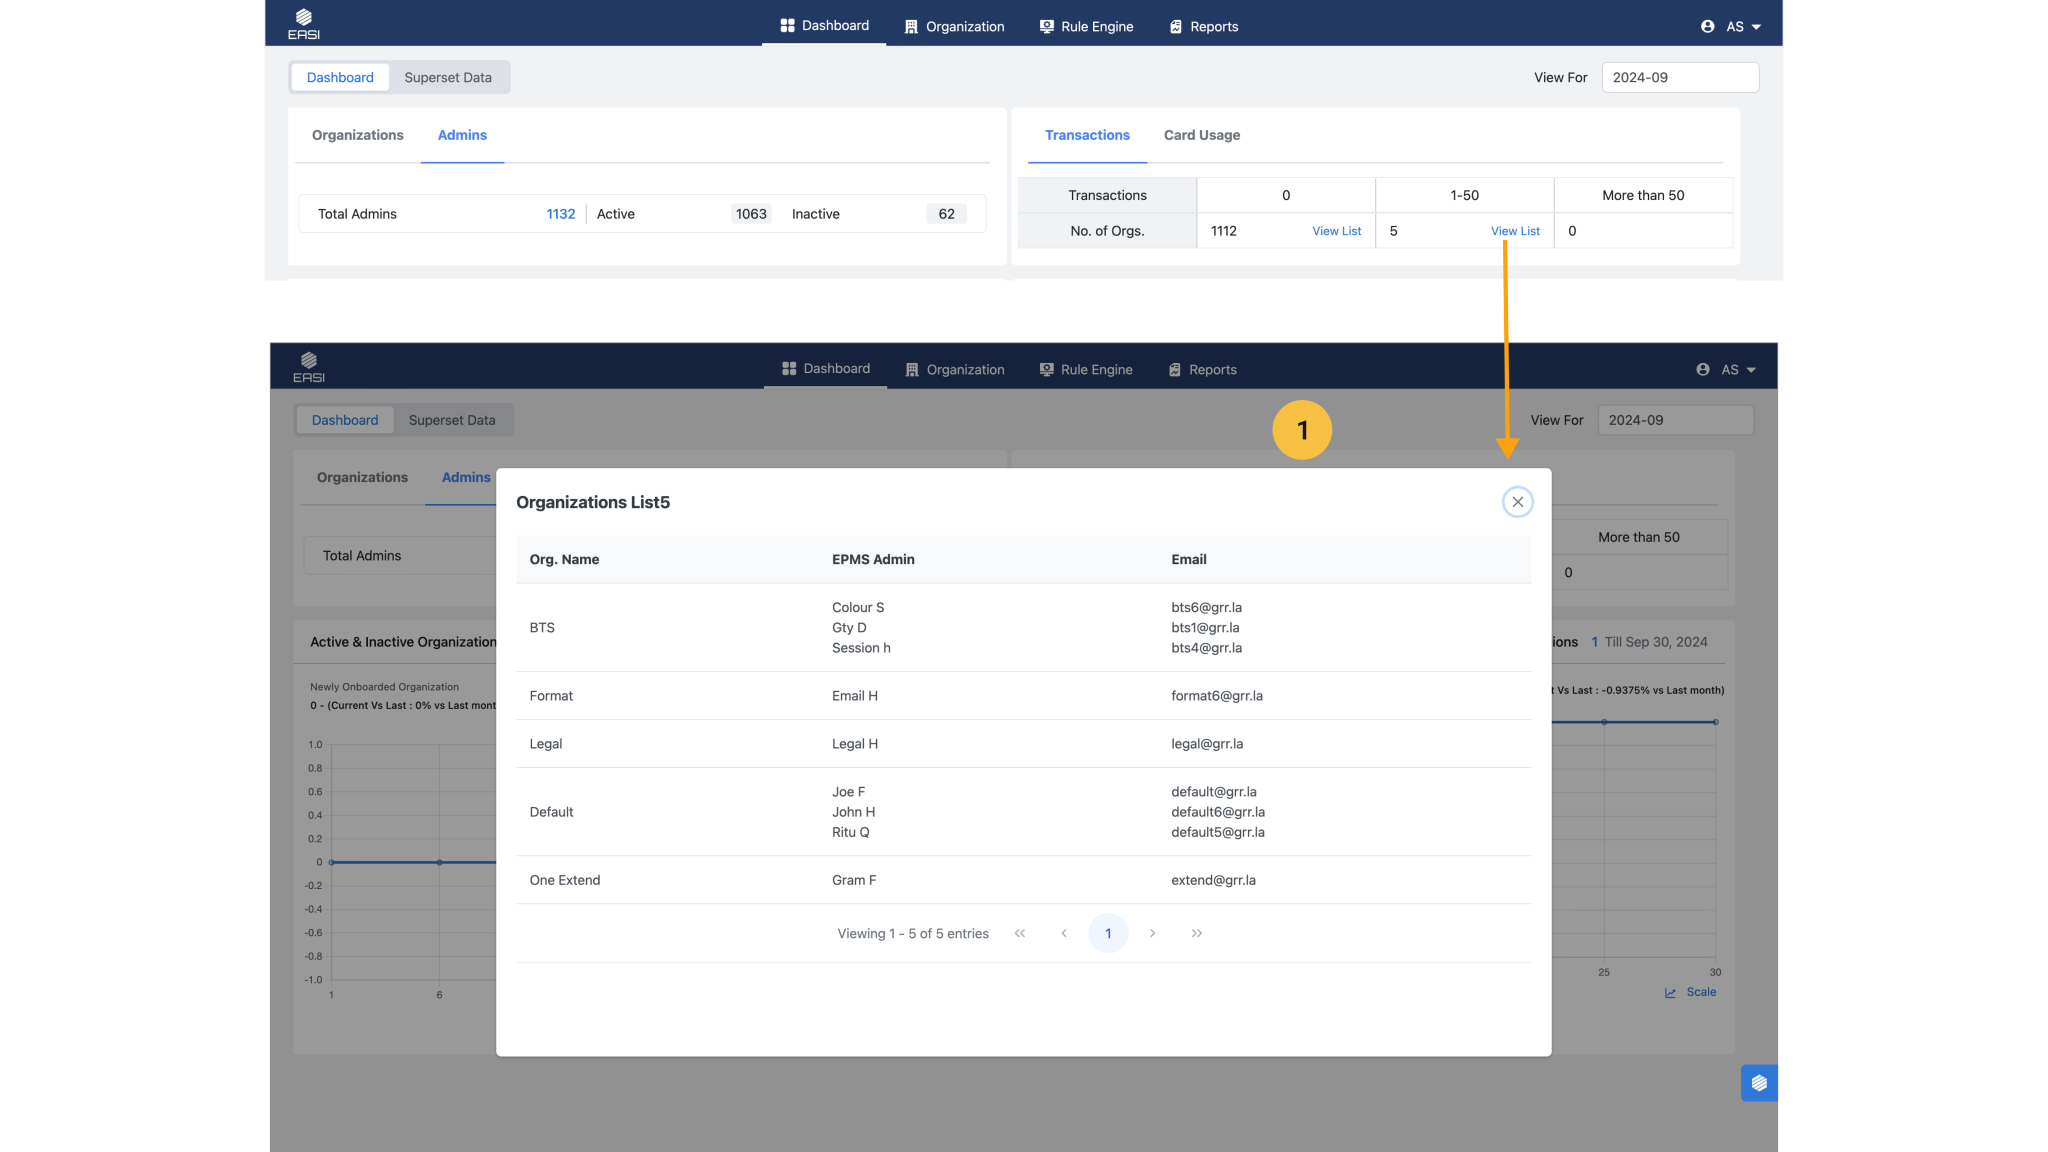
Organization list as per transactions
It provides an overview of organizations as per different range of amounts of transactions that are happening. This helps EASI admins to identify the statuses of organization in being actively operational in terms transactions. In any case if they require to contact the respective admin of that organization they can do so.
The card usage as per 3 different scenarios : Cards whose usage has reached max purchase limit of over time Cards which is in use but hasn’t reached the max limit Cards which are yet to be used for transaction
1. <span data-metadata=""><span data-buffer="">View by month/year<span data-metadata="">
To view the transactions, card usage and transactions over a time period the EASI Admin can use calendar to view the required details.
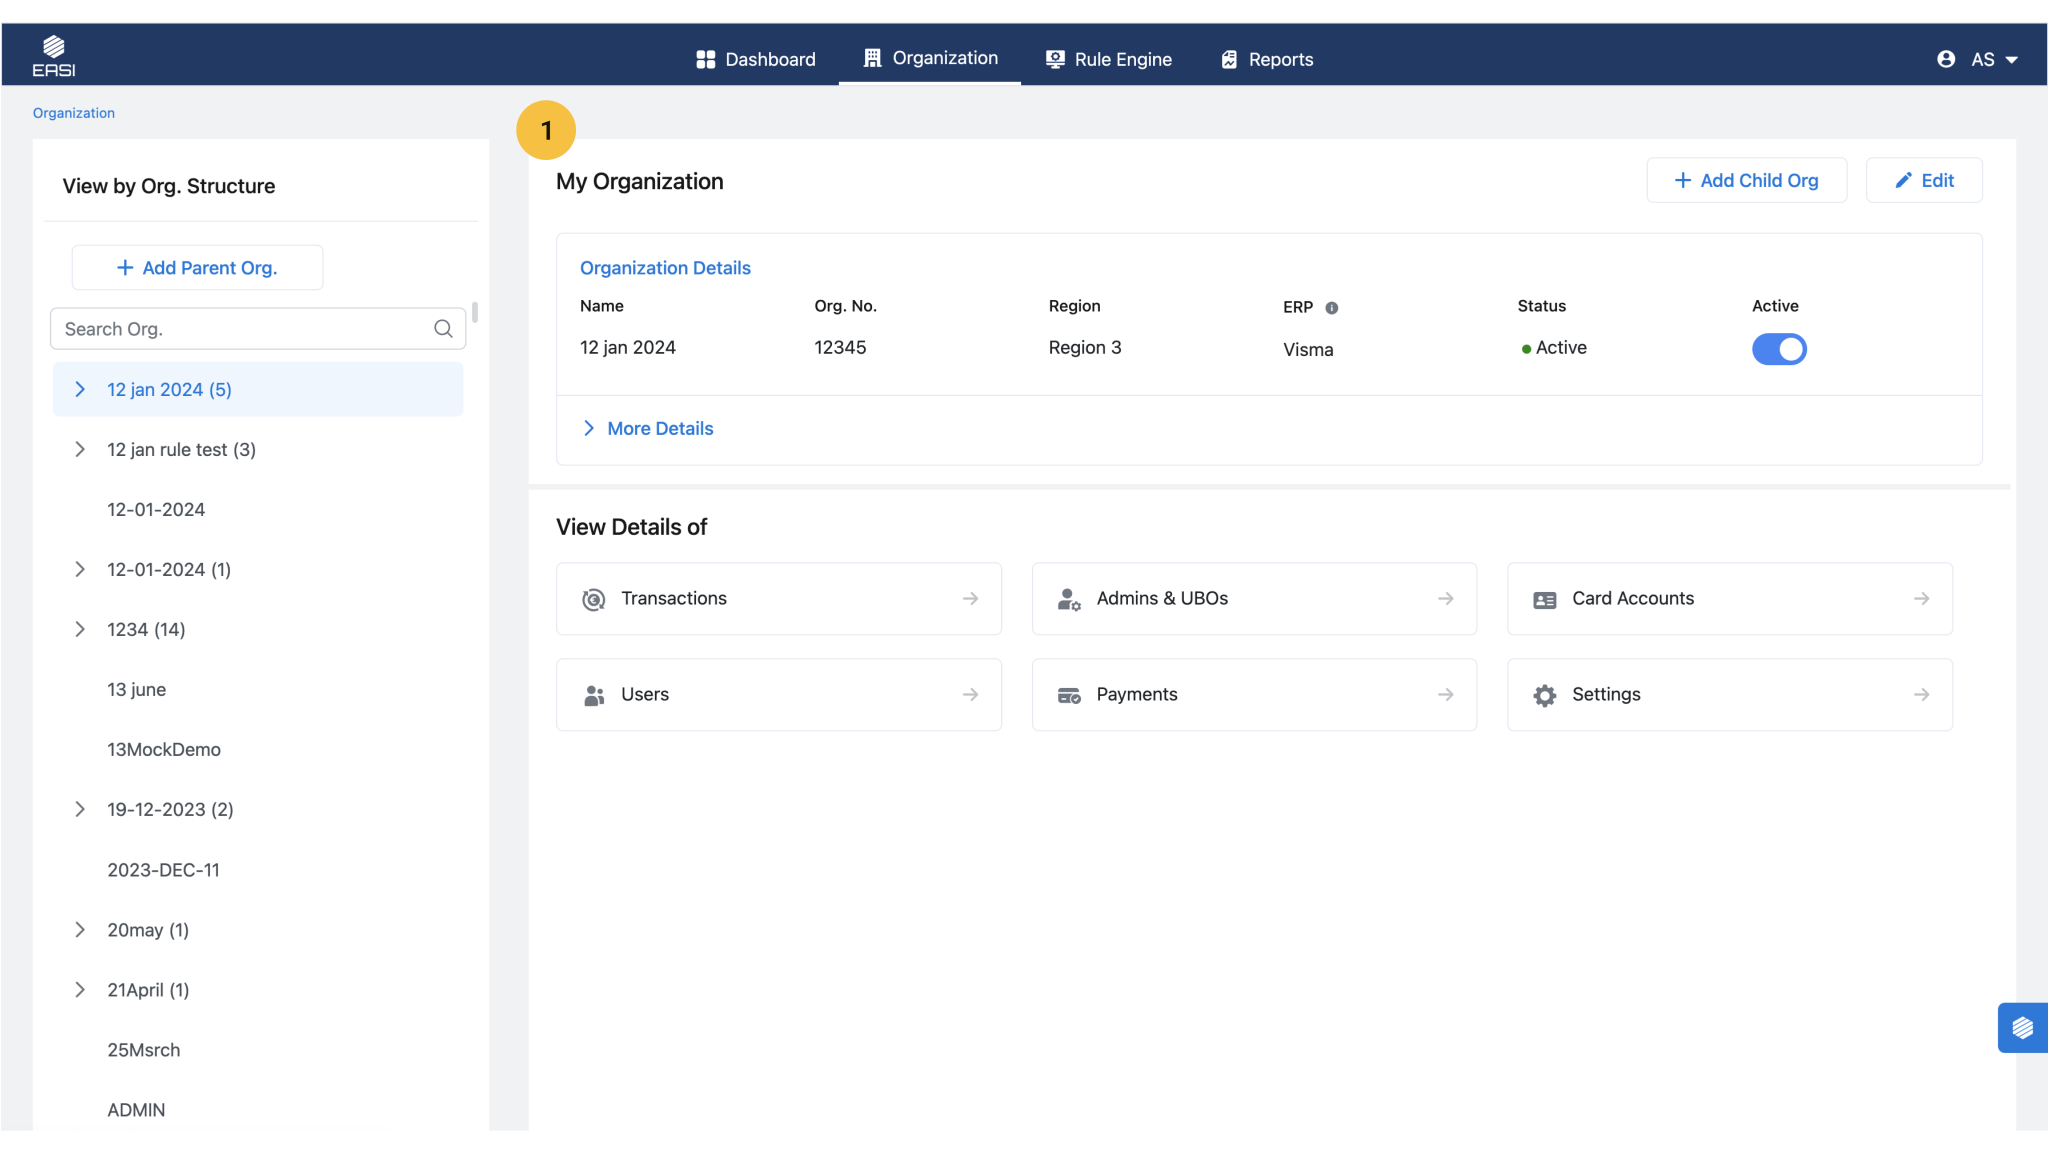
The organization module of EASI Admin and EPMS Admin portal have similar functionalities and layout. Except that the EASI Admin portal has the feature to view all the Parent organizations and they can add Parent organization.
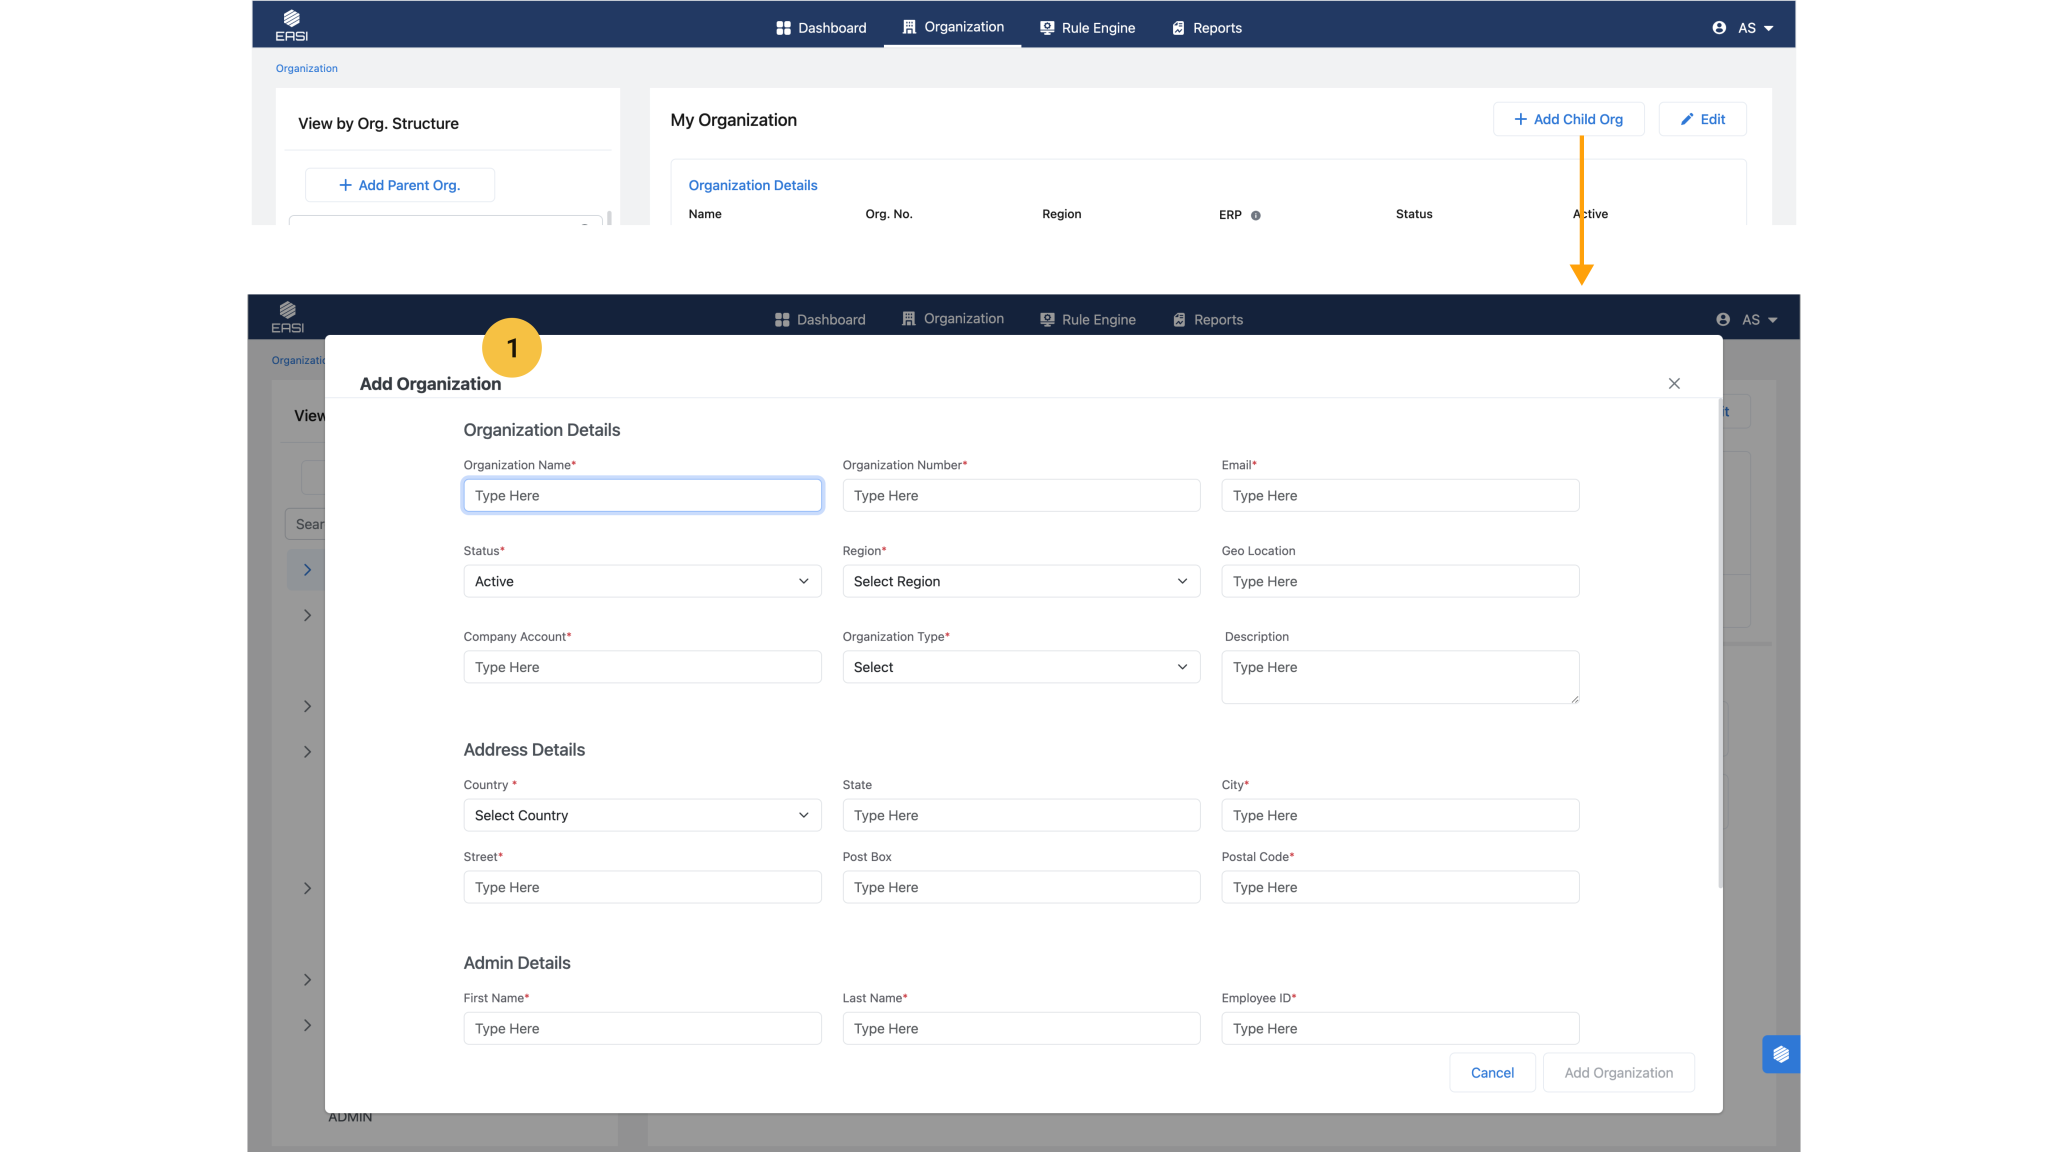
<span data-metadata=""><span data-buffer="">1.Steps To Add Parent Organization:<span data-metadata="">
i.Open the “Add Organization” modal window by clicking the “Add Parent Org. “button.
ii.Enter the mandatory details related to the Organization and address segment correctly along with Admin details.
iii.Click “Confirm” to add the organization.
Note: •You can cancel the process if necessary. A confirmation will be required for your action upon clicking Cancel. •The new organization can be accessed from the organization tree structure on the landing page.
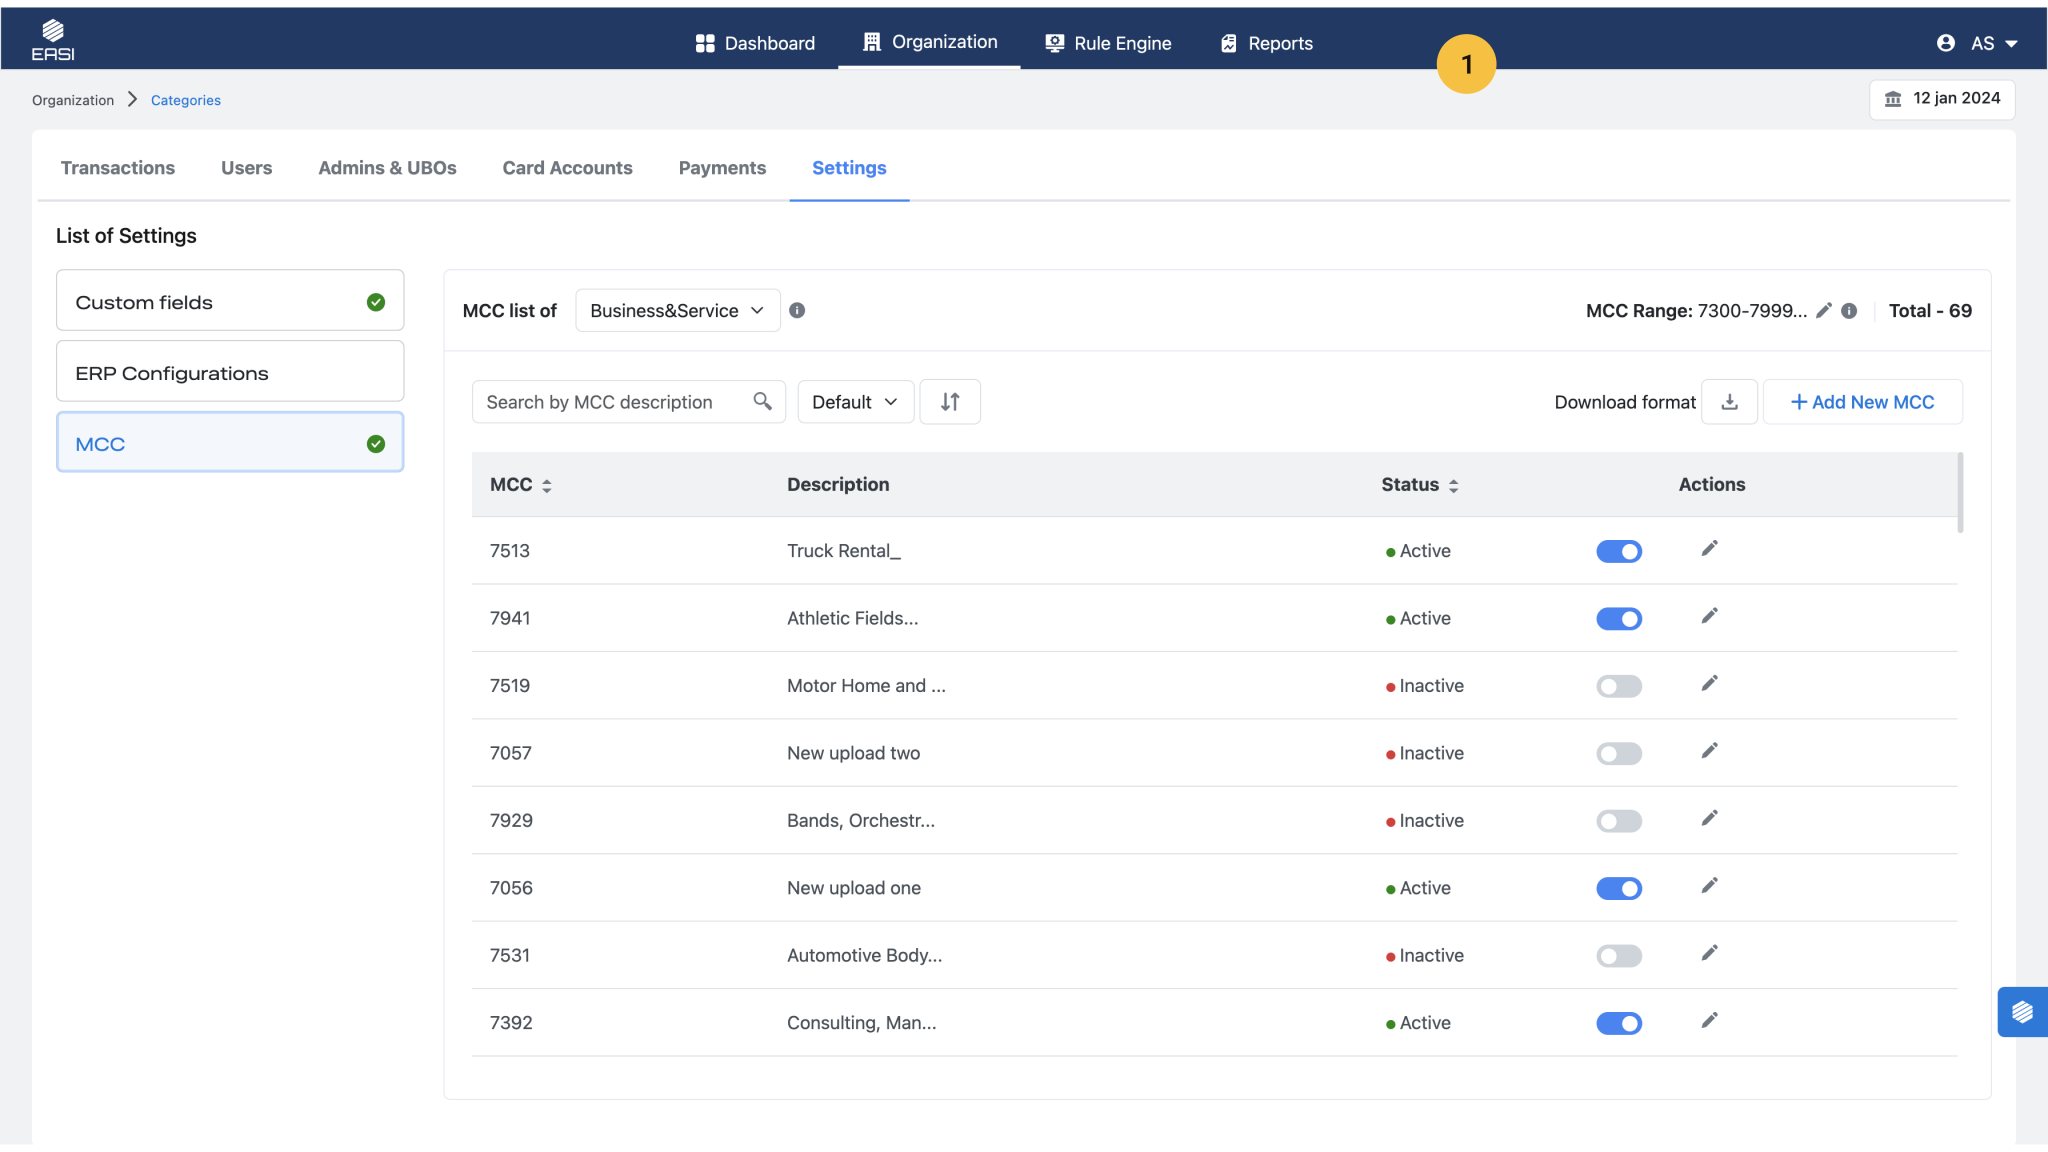
In the EASI Admin portal, MCC settings are used to add MCC ranges and MCCs that crucial to set expense rules. Additionally, any requested new MCCs from EPMS Admins are also added here.
<span data-metadata=""><span data-buffer="">Steps to Edit MCC Range:
i.Open the “Settings” page within the “Organization” module.
ii.Select “MCC” settings.
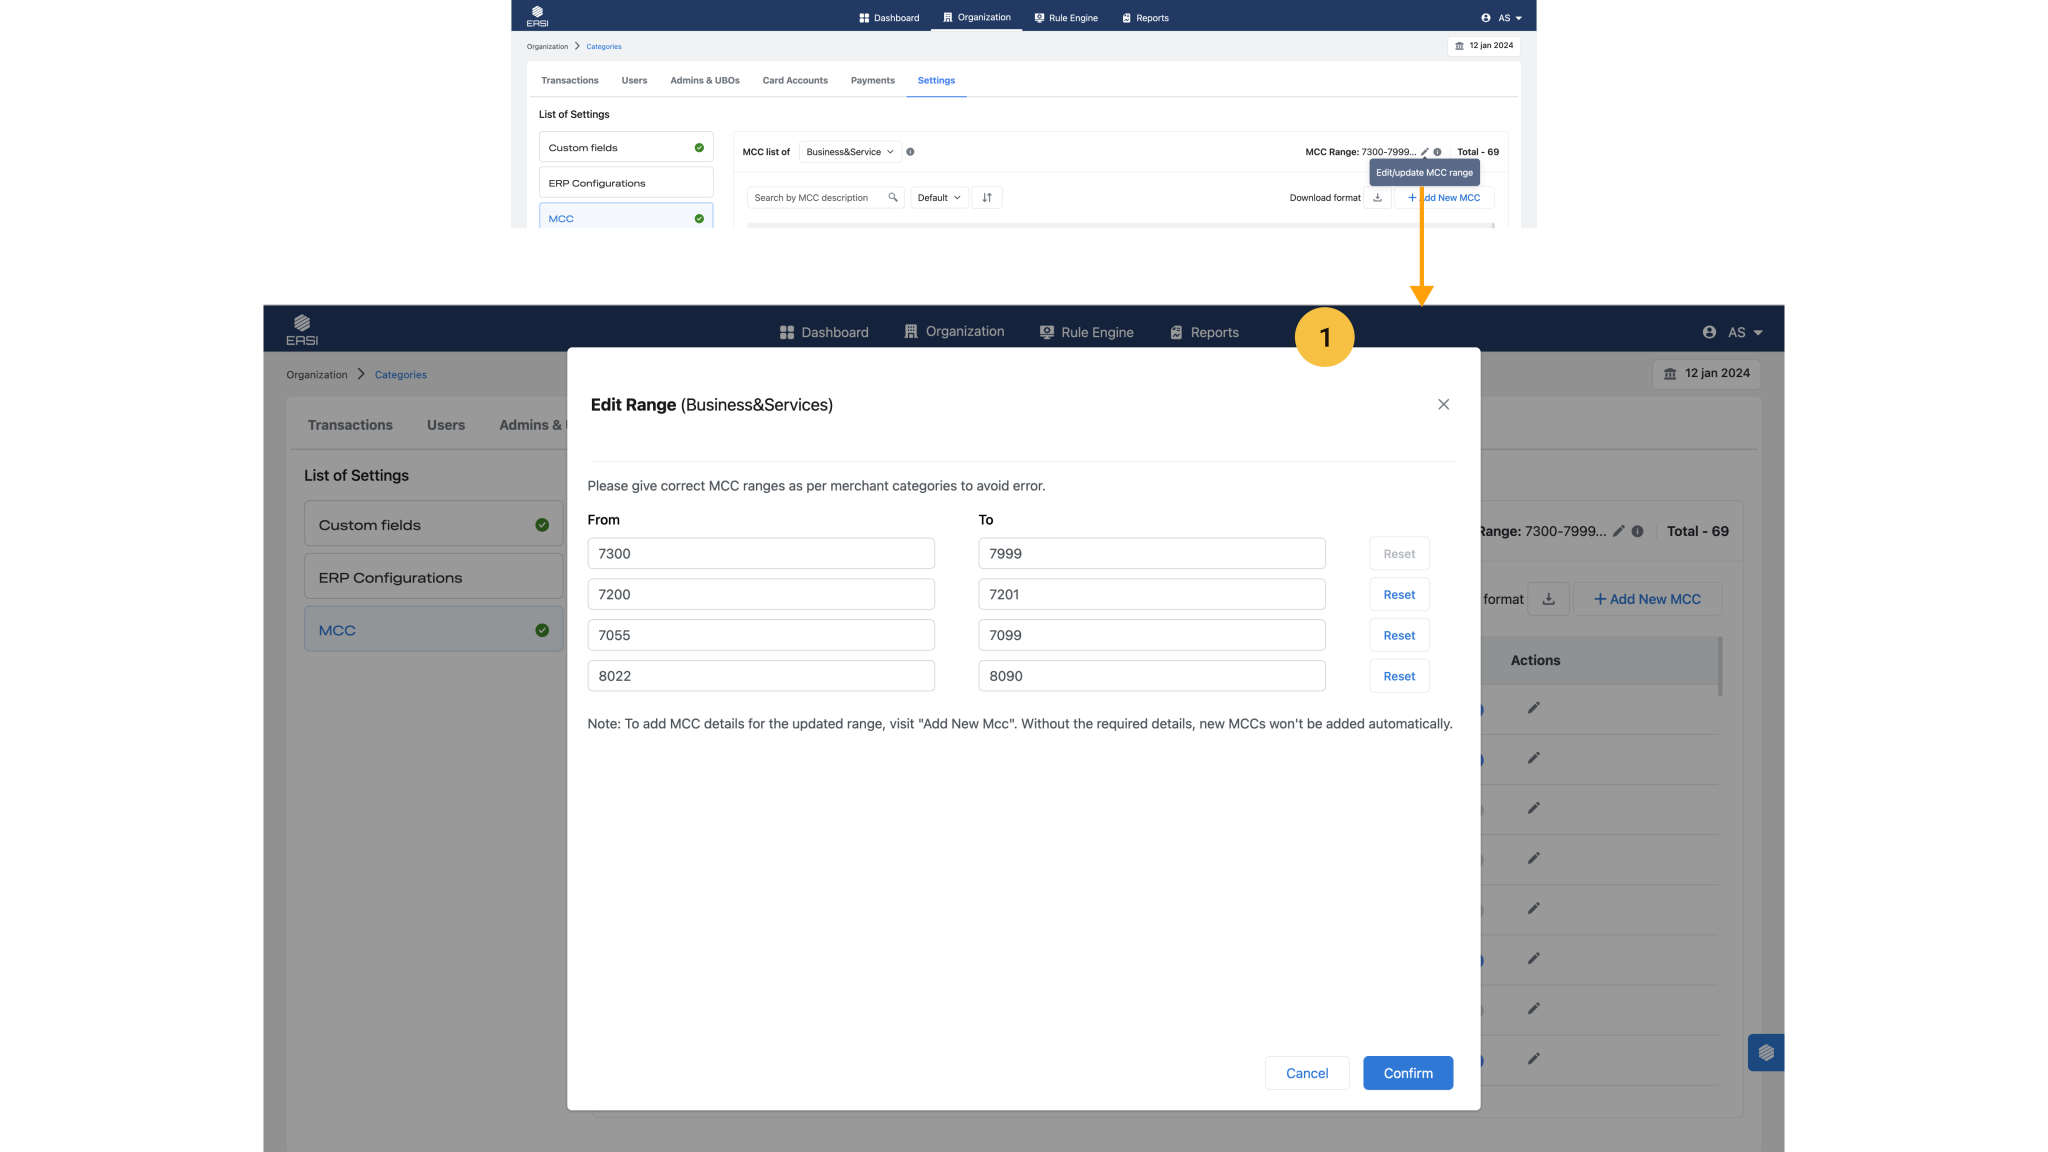
iii.Click the edit icon next to the MCC Range to open the modal window for editing. iv.Edit the existing ranges (remove or provide a new range) without duplicating any entries. v.Click “Confirm” to complete the editing process.
Note: At least one MCC Range must remain active; therefore, editing is not permitted if it would deactivate the only active range.
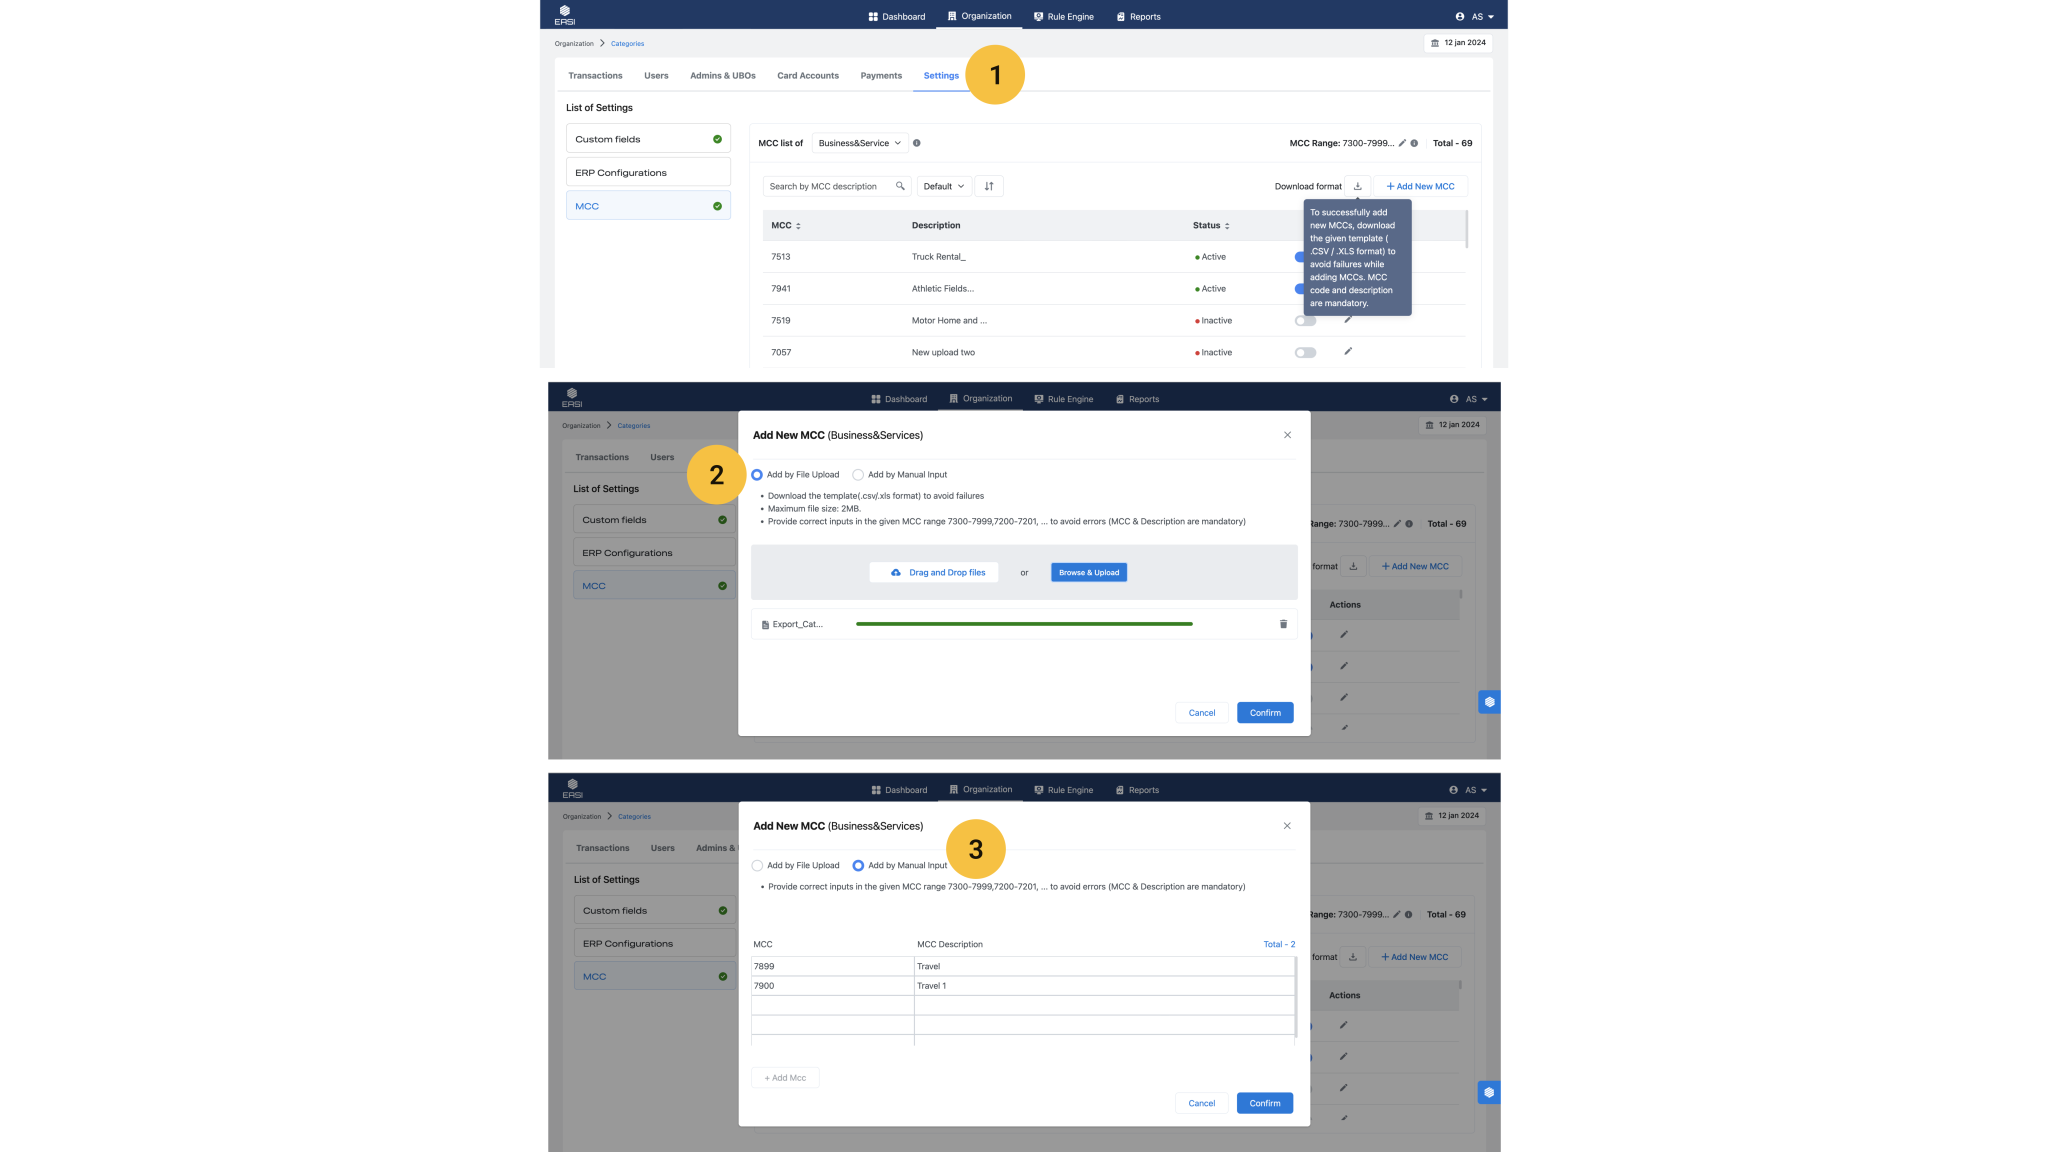
i.Navigate to the “Settings” page within the “Organization” module. ii.Select “MCC” settings. iii.Click on “Add New MCC” to open the modal window for adding MCCs. iv.Choose the default option “Add by File Upload” or select “Add by Manual Input.”
Add by File Upload Steps: i.Upload the list of MCCs using the compatible template and format provided in the portal. ii.Click “Confirm” to complete the process of adding accounts.
Add by Manual Input Steps: i.Enter the MCC and descriptions, which are mandatory for completing the details. ii.Click “Confirm” to finalize the addition of accounts.
Note: These steps should also be followed after adding any new MCC range to ensure the new range includes MCC details.
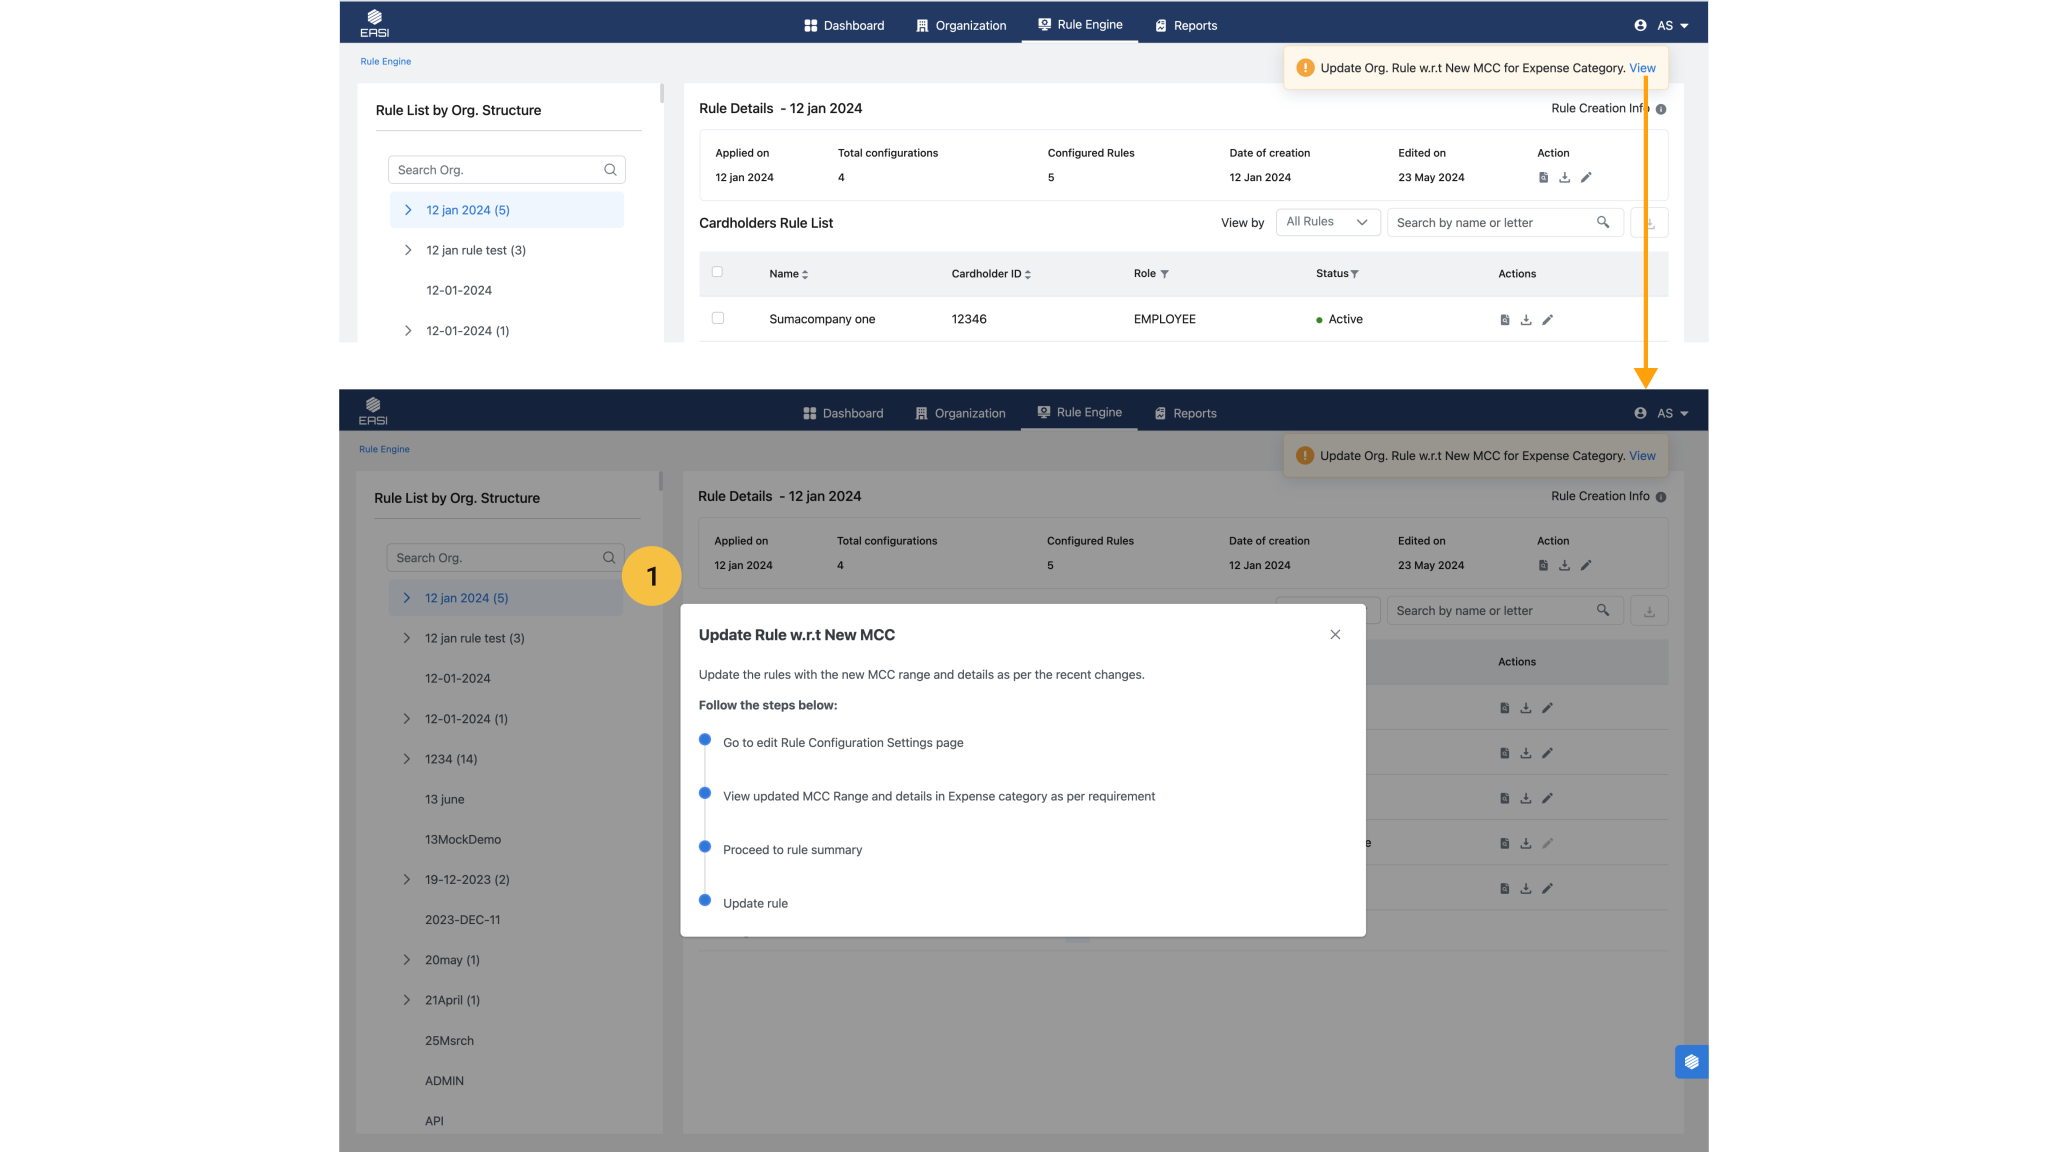
<span data-metadata=""><span data-buffer="">Update MCC Details in Rule Engine:<span data-metadata="">
After adding the MCC range and details in Settings, it is essential to update the Rule Engine to update the Expense Categories with the new MCC details.
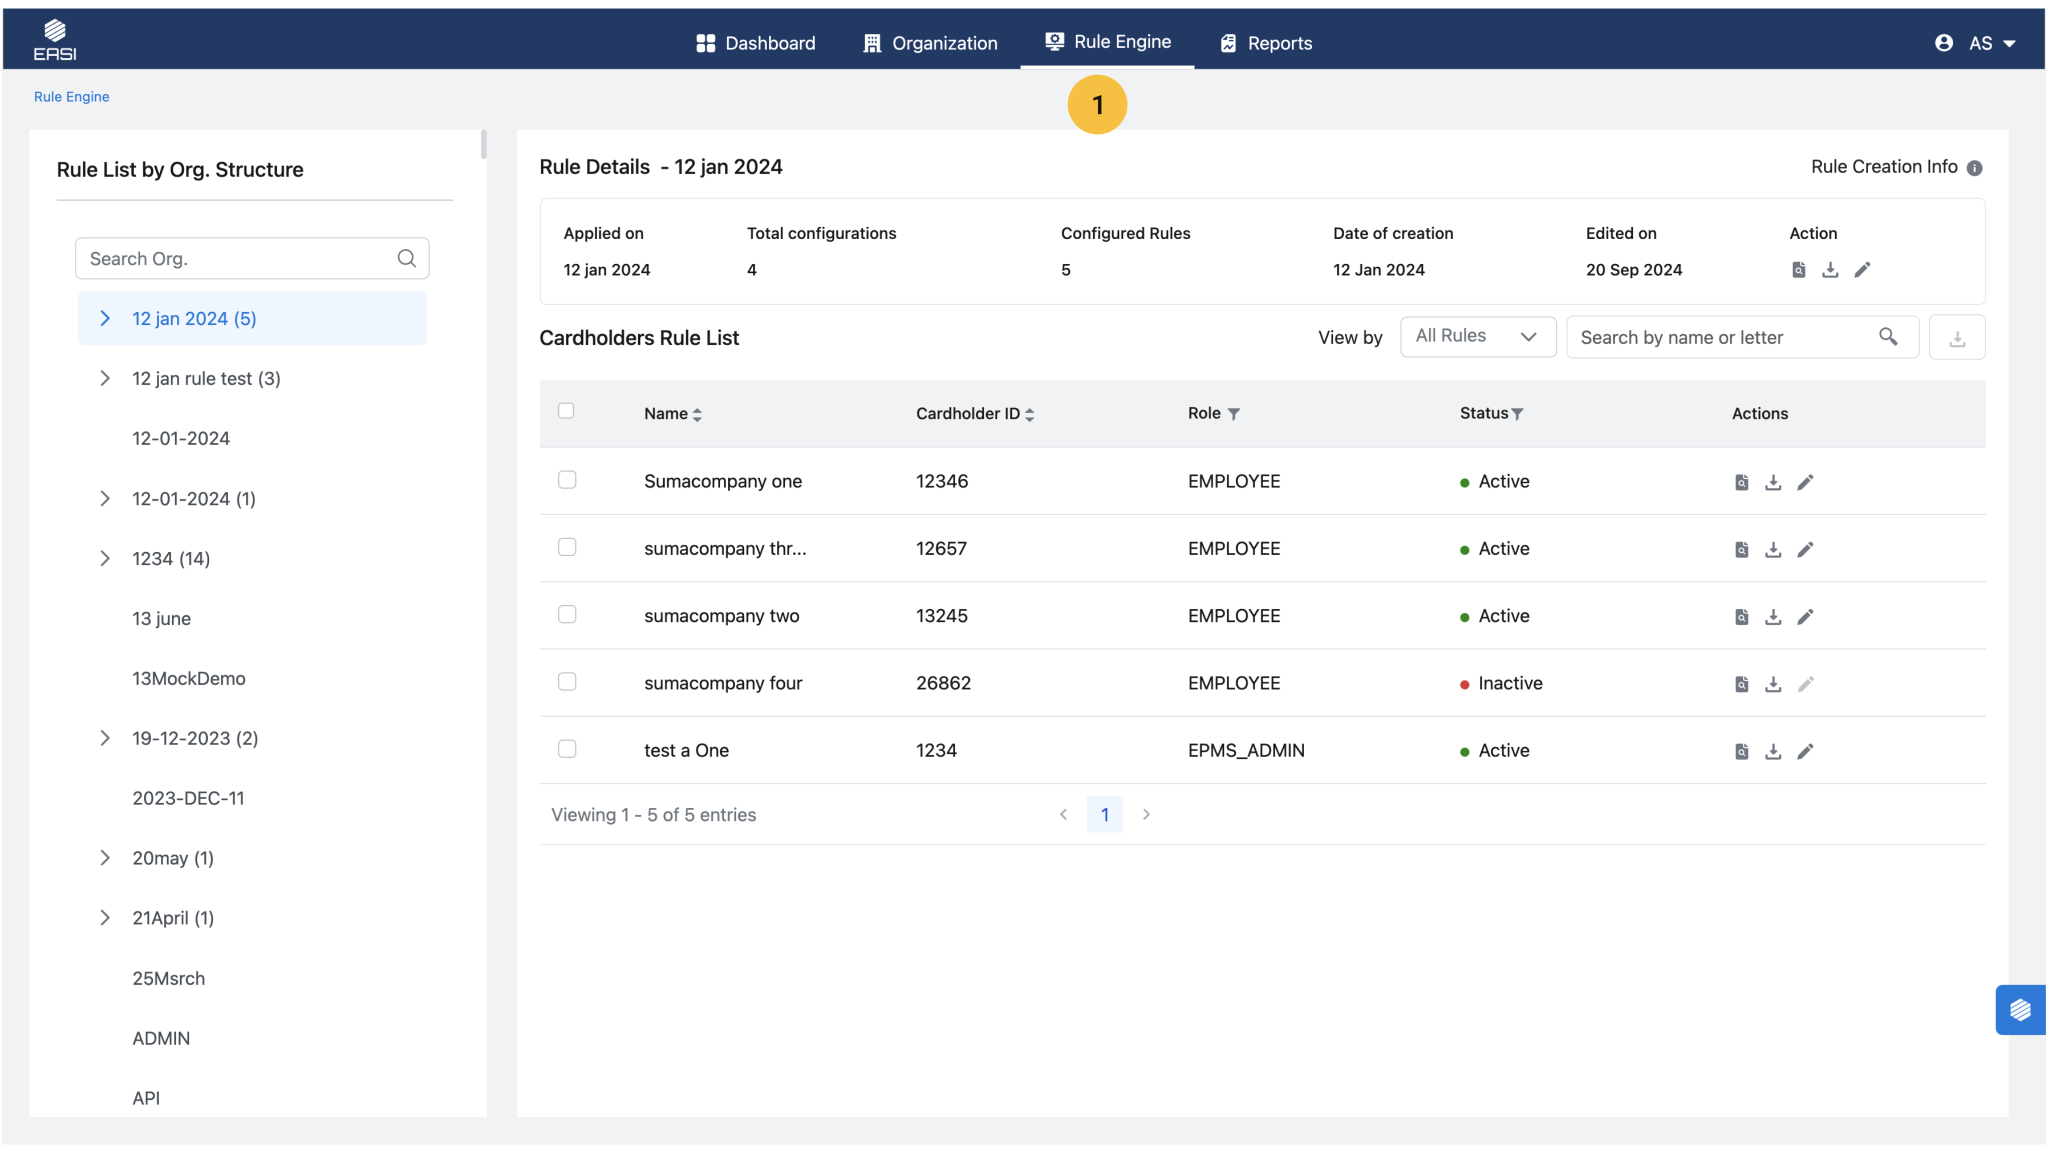
The Rule Engine module of EASI Admin and EPMS Admin portal have similar functionalities and layout. Except that the EASI Admin portal has the feature to view all the Parent organizations and their Sub Organization levels.
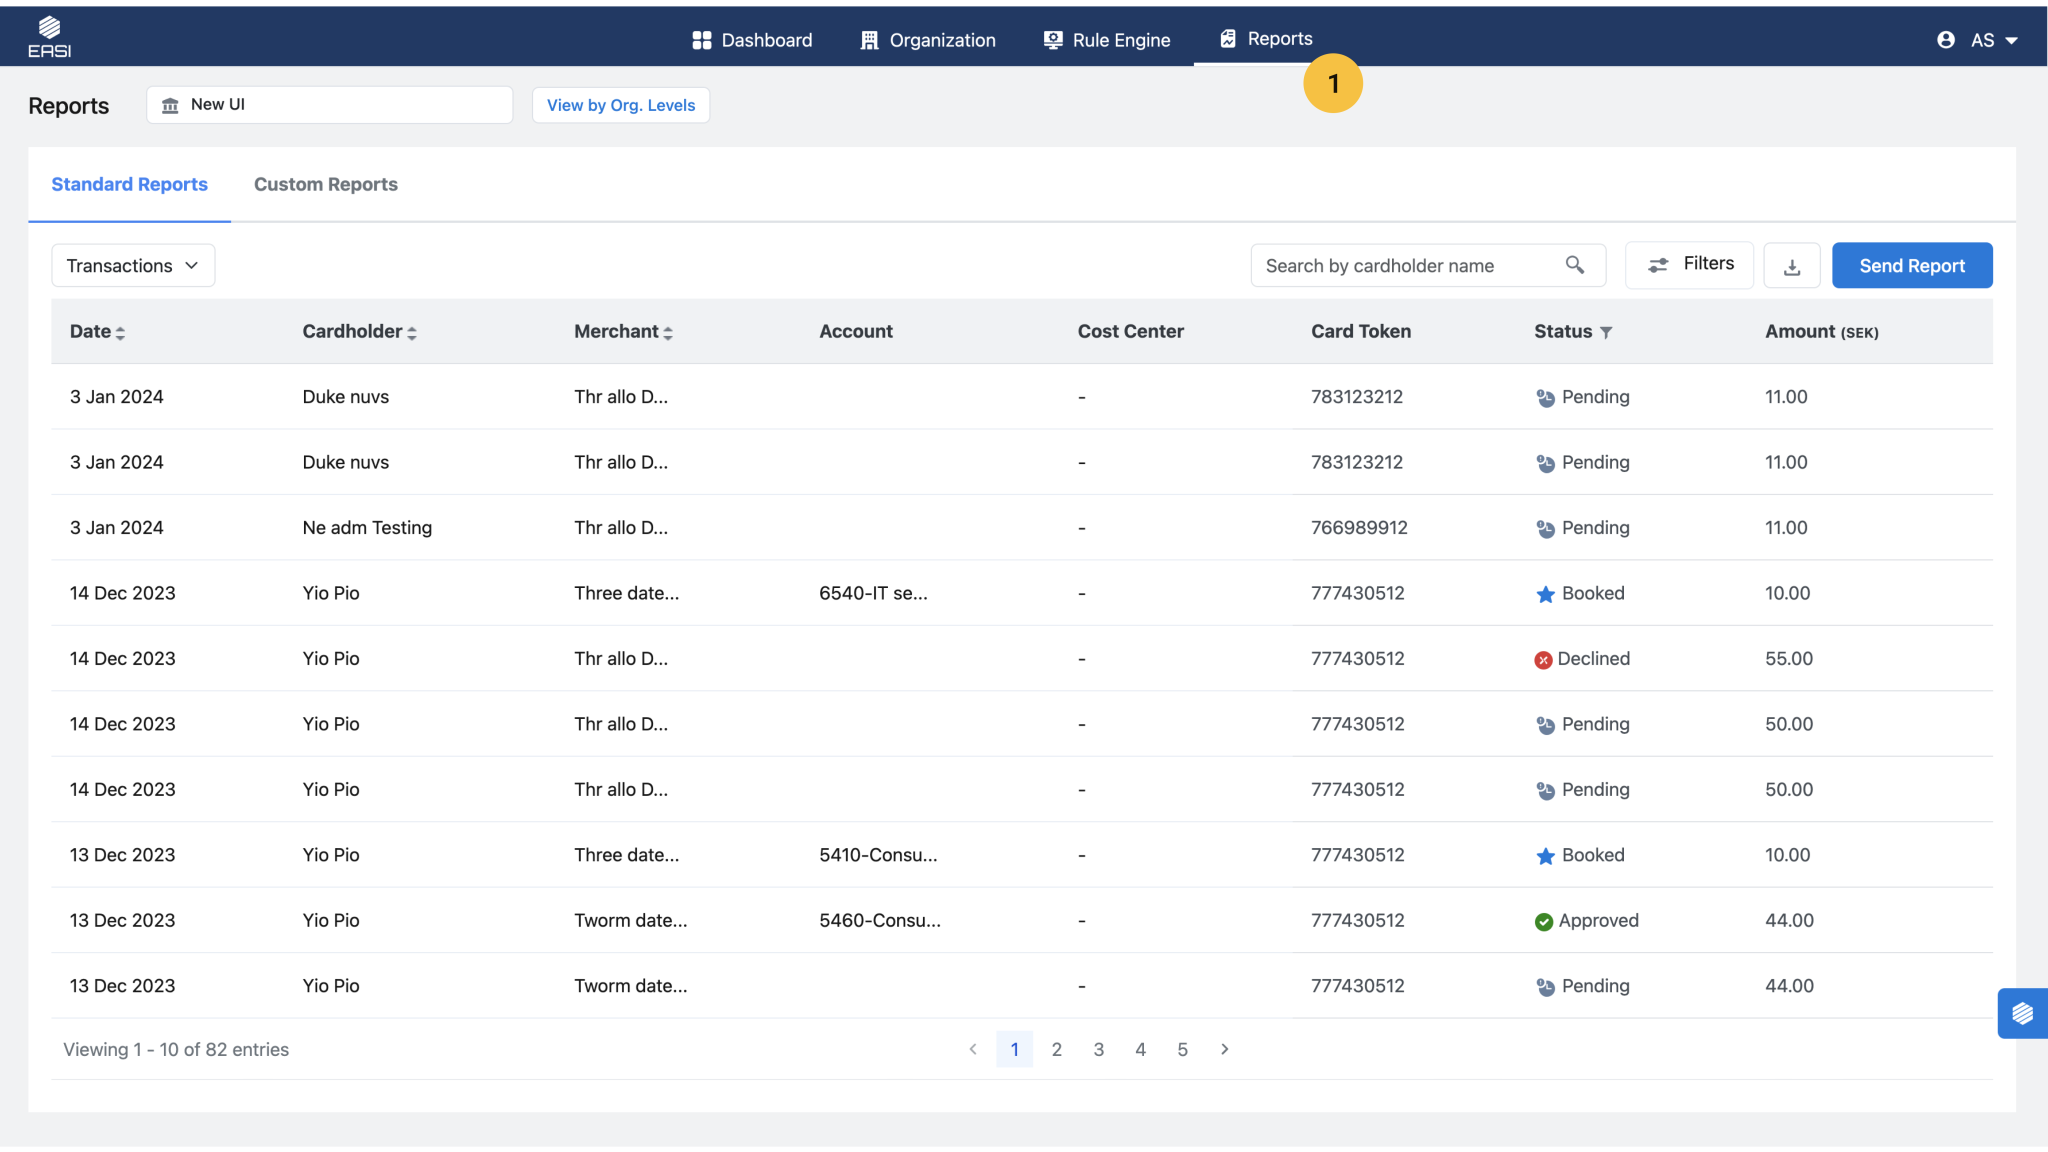
Reports:
The Reports module in EASI Admin and EPMS Admin features similar functionalities and layouts. However, EASI Admin portal allows Admin to view transaction detail reports for all parent organizations and their sub-organization levels. Custom reports share the same features and functionalities.
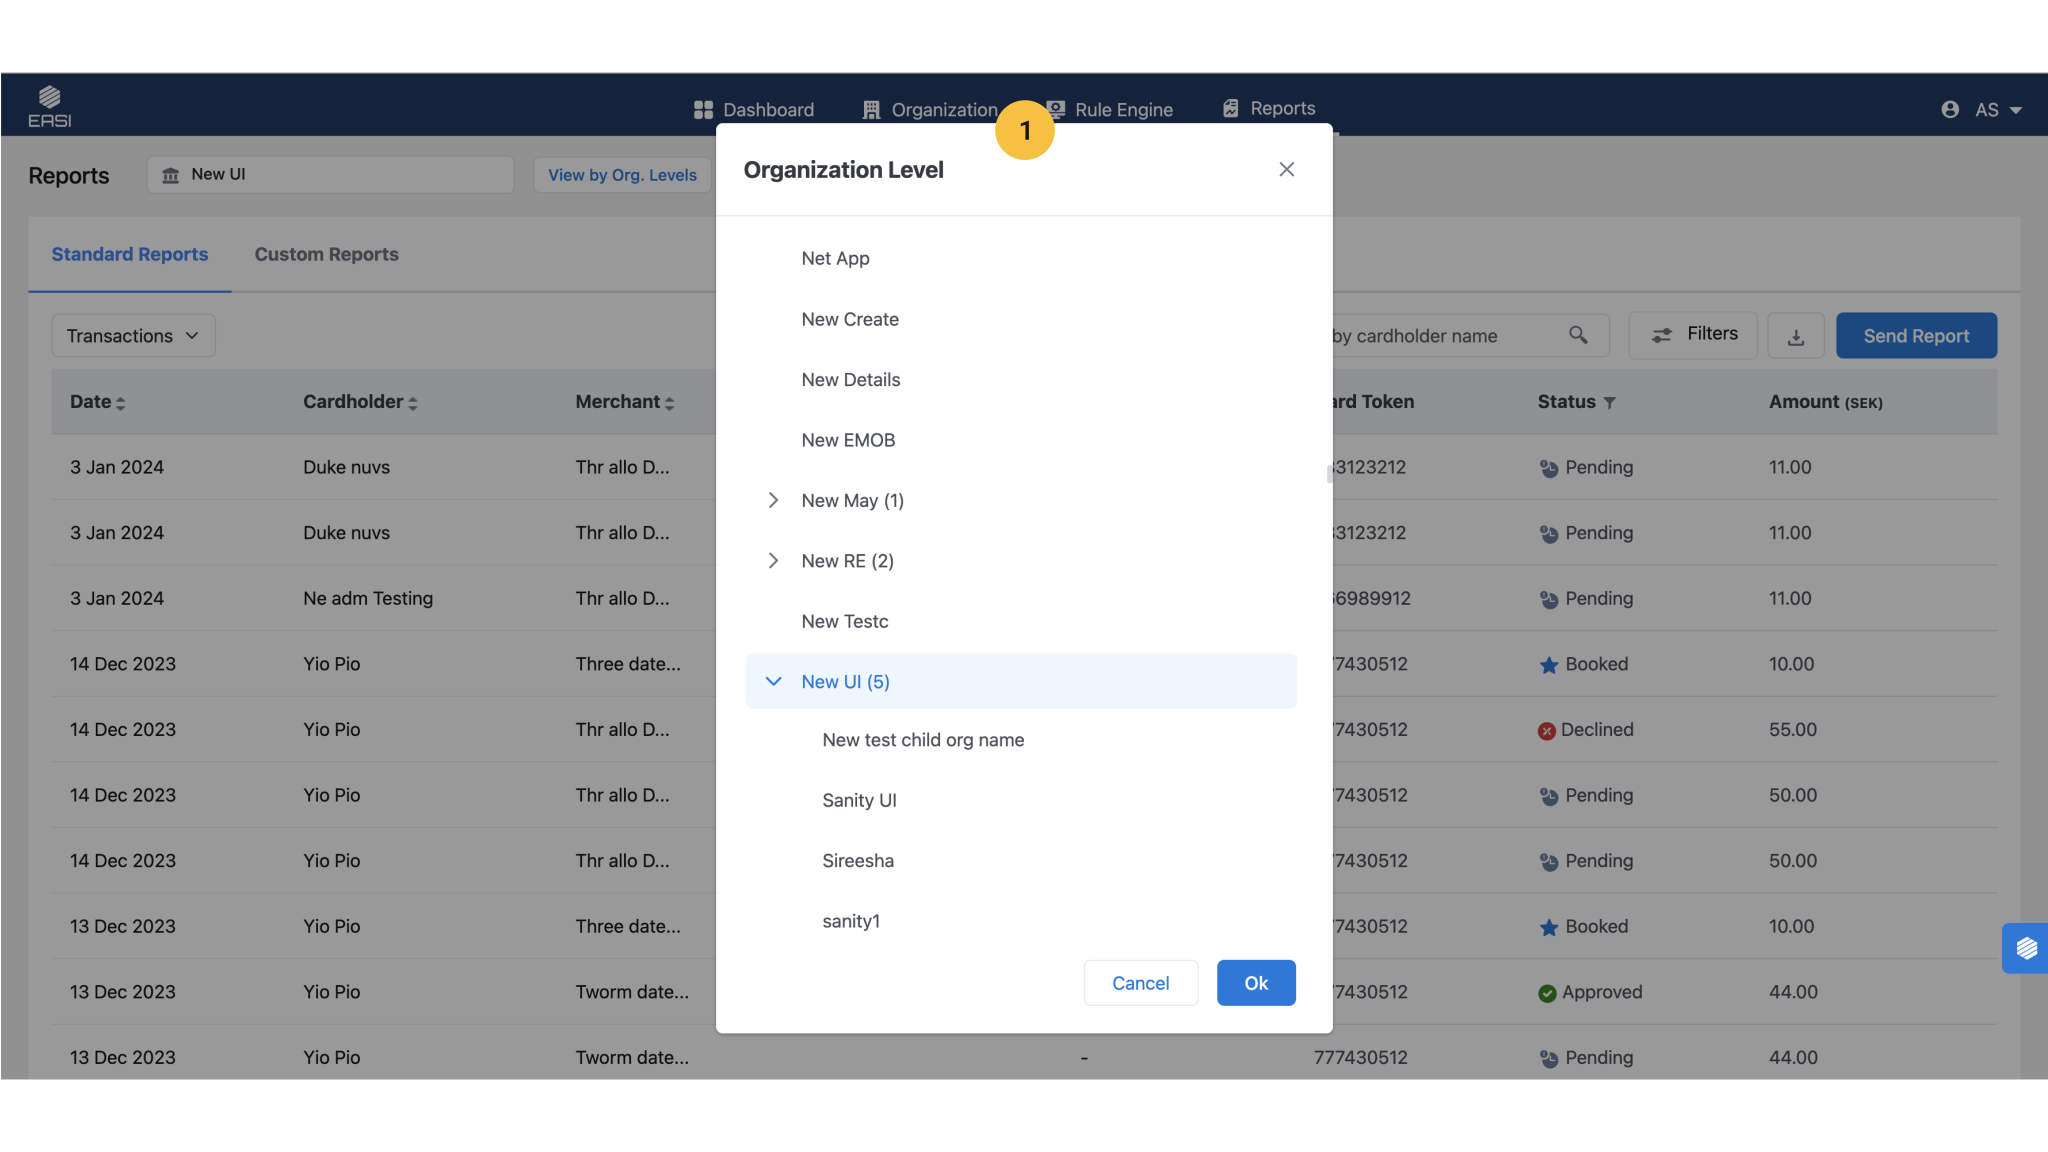
Organization Level for Viewing Reports:
The modal window displays a list of all parent organizations and their sub-organization levels. EASI Admin can select the required level to view specific report data.